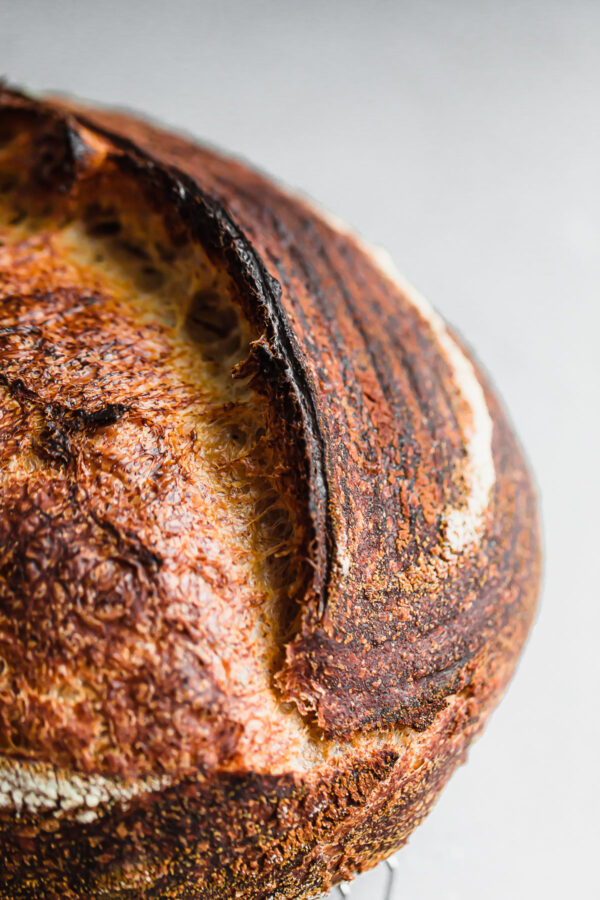
Artisan Sourdough Bread Recipe
My favorite everyday artisan sourdough bread recipe. For more visuals and guidance, please watch my step-by-step YouTube video and reference my other sourdough resources.

While it requires patience and dedication, bread baking has become a serious passion of mine. I created a sourdough starter nearly two years ago and bake bread (and sourdough pizza) at least once a week. I absolutely love it.
Recipe Note: This sourdough bread recipe offers a rough timeline, but will need to be adapted to meet your specific conditions. Ambient temperature, starter strength, and flour type (as well as other variables) affect fermentation and play a very important role in bread baking.

Sourdough Starter: The Basics
To make homemade sourdough bread, you’ll need an active, mature sourdough starter. I recommend The Perfect Loaf’s sourdough starter guide or Baker Bettie’s beginner guide.
You can also ask a fellow baker or bakery for some starter or even buy it online. Starters are active organisms and require daily feedings, unless they are refrigerated for short periods. The time commitment and work is minimal, but absolutely necessary for its viability.
If you have any questions, please read my Sourdough Starter Troubleshooting Guide for tips and guidance.
For more guidance and tips, check out my complete guide with my favorite sourdough tools and resources.

Common Mistakes To Avoid:
Once you have an active sourdough starter and a few basic tools (see a list below and complete guide here), you can start making sourdough bread. How exciting is that?!
How do I know if my starter is ready to use?
- You will need an active, mature sourdough starter to make this bread. It should be on a predictable feeding schedule. This will vary, but it should double or triple in volume between feedings.
- Ideally, your sourdough starter should require at least one, preferably two, daily feedings on 1:5:5 ratio. For more information on feeding ratios, please review my Sourdough Starter Troubleshooting Guide. While you can make bread with less active starters, you’ll need to watch the dough carefully and most likely have to extend bulk fermentation significantly.
- The most common mistake for new sourdough bakers is poor fermentation and under-proofing, which is often the result of a weak or young sourdough starter. Under-proofing produces dense, gummy, and poor crumb structures.
- If your sourdough starter is sluggish, I recommend building up its strength with another week or two of feedings before baking again. Sourdough bread baking is a learning process and requires a lot of patience, as well as trial and error.
Troubleshooting Issues:
If you’re experiencing troubleshooting issues with this recipe or other sourdough baking, please check out my Sourdough Bread Troubleshooting Guide.

How to Make Artisan Sourdough Bread:
Important Note: Many sourdough bread recipes call for preparing an off-shoot levain (eg. starter) for baking. I prefer to use a portion of my ripe, just peaked starter. This eliminates one extra step, as well as works better for my normal feeding schedule and preferred baking timeline.
This choice is up to you and can be tweaked/adapted to fit your schedule or starter feeding schedule, but please plan accordingly. Either way, you’ll need to account for the starter amount in the recipe below (90 grams), as well as the normal amount required to maintain your mother (main) starter.
To prepare to bake the following morning, I scale up the previous night’s feeding to the following:
- 12 grams ripe starter
- 60 grams flour
- 60 grams water
*Note: This is a 1:5:5 ratio. You will need to adapt or tweak this to ratio to fit your own starter activity level.

*Note: Before getting started, please watch my YouTube step-by-step instructional video. For a printable recipe and example baking timeline, please scroll down to the recipe box at the bottom of this post.
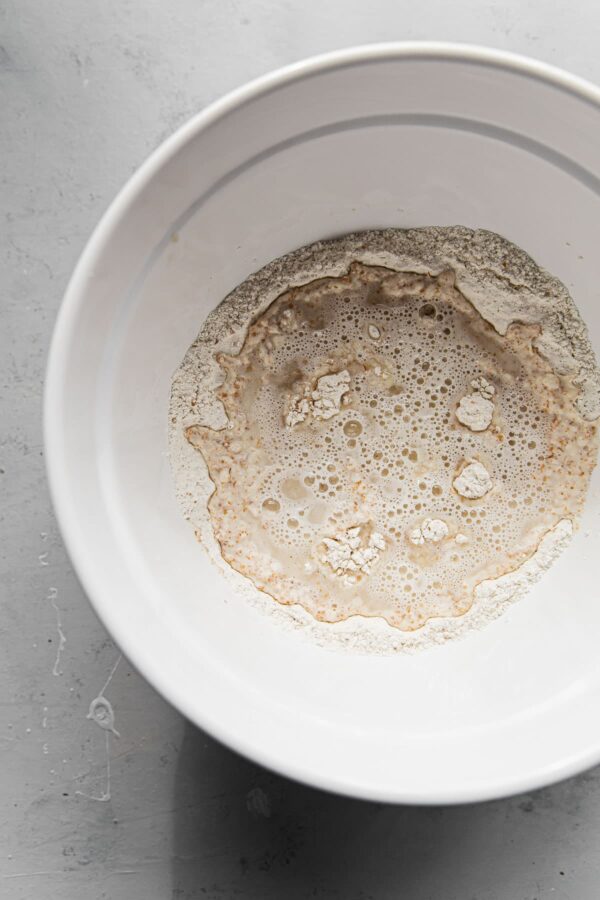
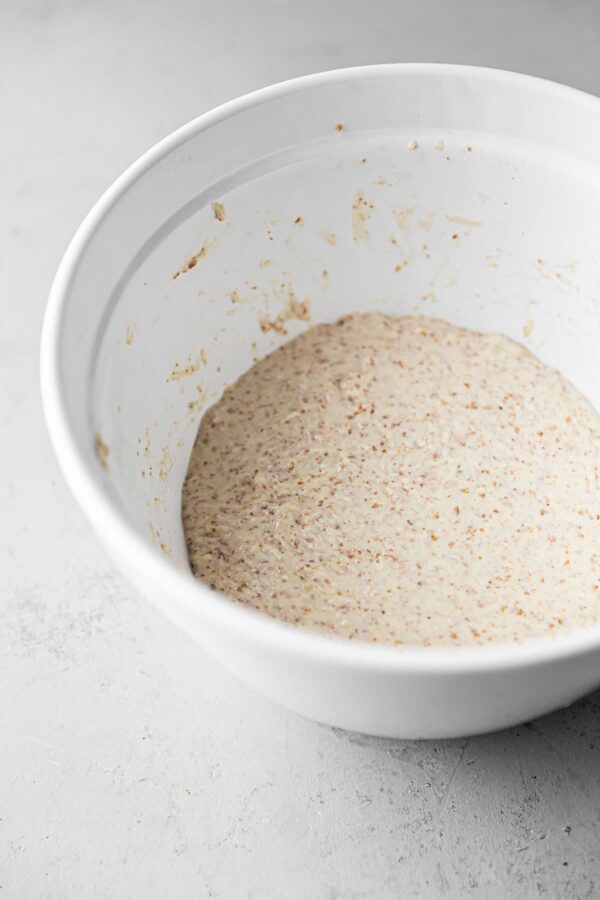
STEP 1: PREPARE THE AUTOLYSE
In a large mixing bowl, whisk together the flours. Add the filtered water (90°F/32°C) and mix with your hands until thoroughly combined and no dry bits are visible. It will be sticky. Cover the bowl with a clean shower cap or plastic wrap and rest at 80°F/26°C for a minimum of 1 hour or as long as 2 hours. This step hydrates the flours and helps with gluten development and dough structure.
I use my Brod & Taylor Proofing Box to maintain a relatively high ambient fermentation temperature. It is an amazing tool, but not necessary for sourdough baking. However, I recommend finding a warmer spot in your kitchen (was 74°F-76°F) for resting your dough. Cooler ambient temperatures will slow down fermentation and might extend bulk fermentation significantly.
*Planning Tip: Since this recipe doesn’t call for preparing an off-shoot levain, I mix and prepare the autolyse roughly one hour before my normal morning starter feeding time (ie. when my starter is ripe and has just peaked).
STEP 2: ADD RIPE STARTER AND REST FOR 30 MIN
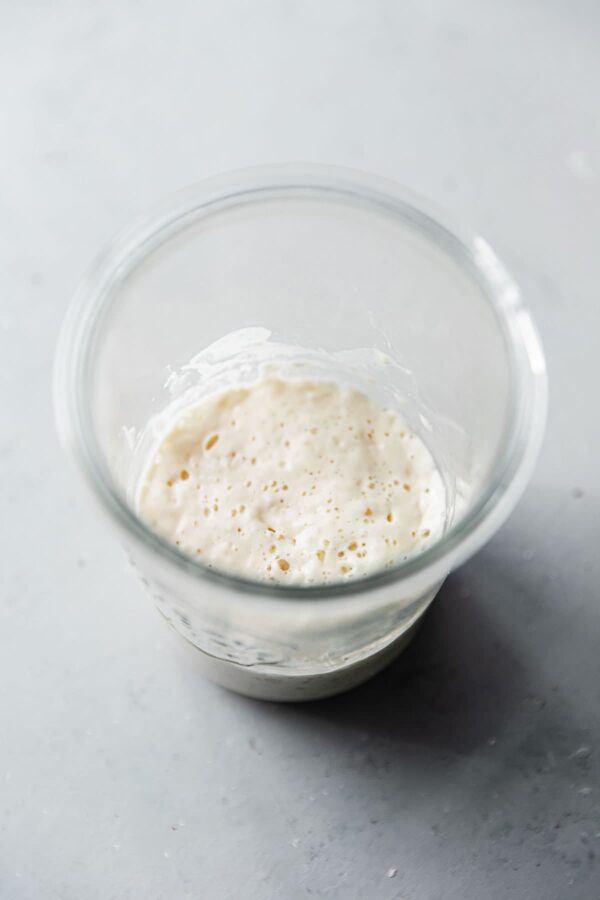
While this test isn’t fool-proof, your sourdough starter should pass the ‘float test’ when it’s ready to be used in your dough. Place a tiny spoonful of your ripe starter in a jar of water, it should float. If it sinks, it is not ready to use and usually requires additional time. Check and test again 15 to 20 minutes later.
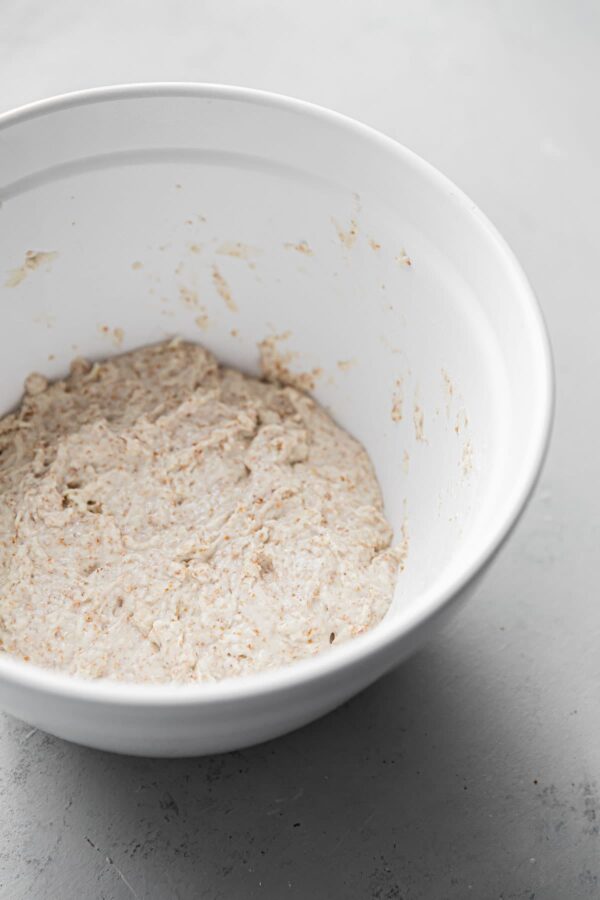
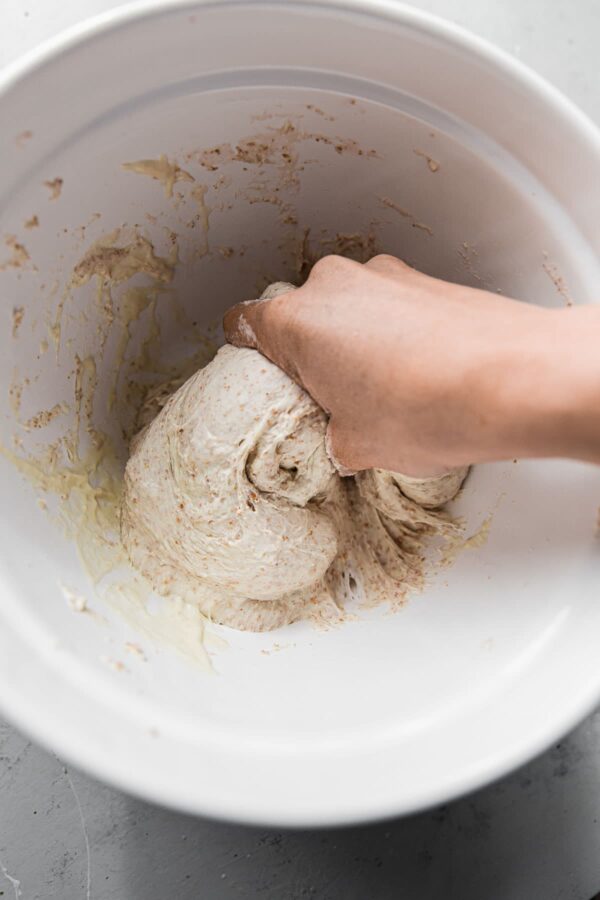
Add the ripe, just peaked sourdough starter. Use your fingertips to spread the starter over the autolyse mixture. Fold the edges of the dough into the center to fully incorporate the starter.
Use your thumb and fingers to pinch the dough (pincer method) repeatedly until the starter is well incorporated. Don’t be delicate. You want to work quickly, but fully incorporate the mixture. Cover once again and rest at 80°F/26°C for 30 minutes.

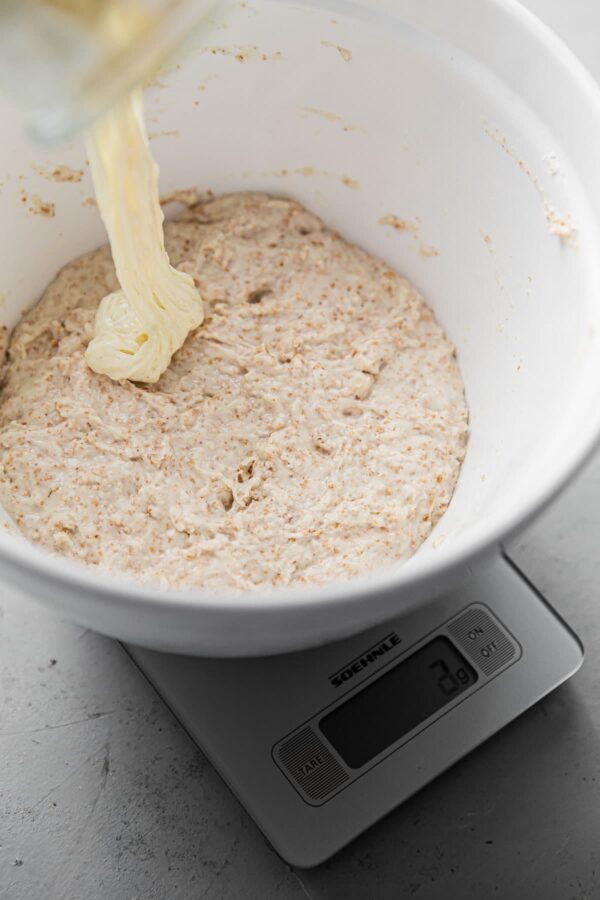
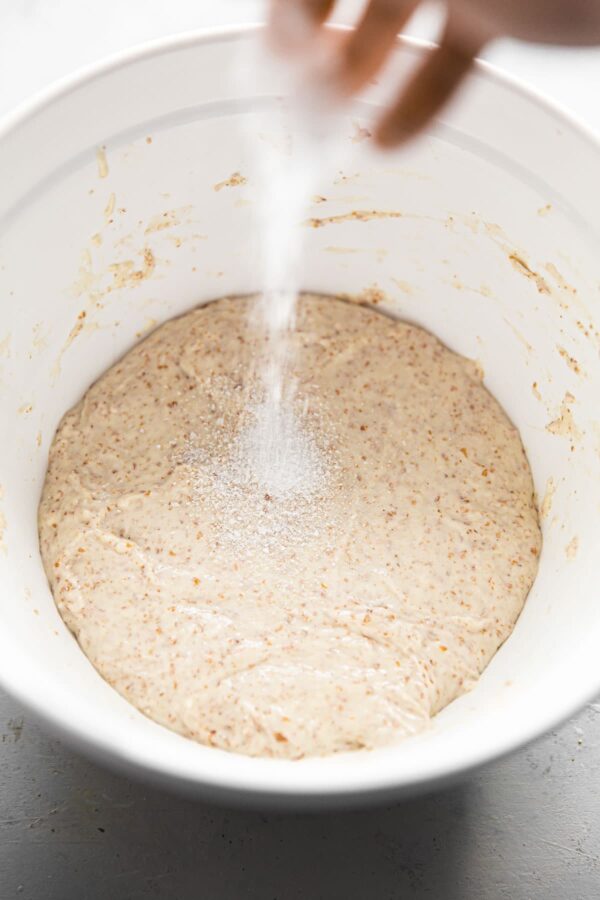
STEP 3: ADD SALT AND REST FOR 15 MIN
Sprinkle the salt over the surface of the dough. Use your thumb and fingers to pinch and incorporate the salt into the dough (you should not feel any granules at the end of mixing). Be thorough. Depending on the coarseness of the salt, this mixing step usually takes about 3 to 5 minutes.
If you’re struggling with higher hydration doughs and dough strength, there are two additional mixing methods that can try: slap and fold or the Rubaud method. Please see the full video included in this post for visual demonstration.
Cover and rest at 80°F/26°C for 15 minutes before preforming the first stretch and fold set.
STEP 4: BULK FERMENTATION (6 SETS OF STRETCH AND FOLDS)
We’ll preform a total of six stretch and fold sets during the first two hours of bulk fermentation. The first three will take place in 15-minute intervals. The remaining three will occur in 30-minute intervals. Stretch and folds help build strength and extensibility in the dough, and encourage good crumb structure.
To complete a stretch and fold, dip you hands lightly in water (*this will help the dough from sticking). Be careful not to incorporate much water as this is already a high hydration dough. Grab the top portion of the dough with both hands. Gently pull and stretch it upwards (without tearing) and fold over the opposite edge. Rotate the bowl 180 degrees and repeat from the other side.
Rotate the bowl 90 degree and repeat once again on both sides. This entire process is one stretch and fold set. After performing the stretch and folds, I like to gently lift the dough to round it nicely in the bowl (see video).
Cover and rest the dough at 80°F/26°C between each set.

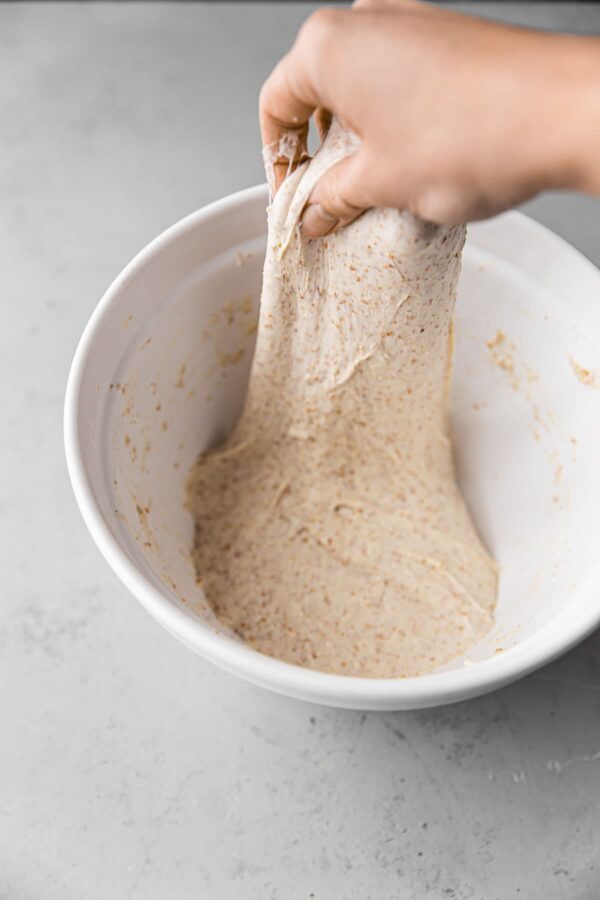
The dough will be very slack at the beginning of bulk fermentation. You’ll notice it building more and more strength as you complete more stretch and folds. Note: The dough will not rise or expand much during this first period.
If your dough is lower in hydration or starting to fight you, stop performing stretch and folds and allow it to rest for the remainder of bulk fermentation. The purpose of stretch and folds is to build strength, but if the dough is already strong, additional sets can have an unintended effect of pressing out gas bubbles.
STEP 5: BULK FERMENTATION (continued)
After you have preformed the stretch and folds, allow the dough to rest, covered, at 80°F/26°C for an additional 1.5 – 2 hours, or until it has nearly doubled in size. The total bulk fermentation time will vary tremendously based on your ambient kitchen temperature, dough temperature (FDT), flour type, and several other factors, so watch it carefully. Always follow the dough’s lead!
Judging the right point to end bulk fermentation and move to the pre-shape period requires practice and trial-and-error.
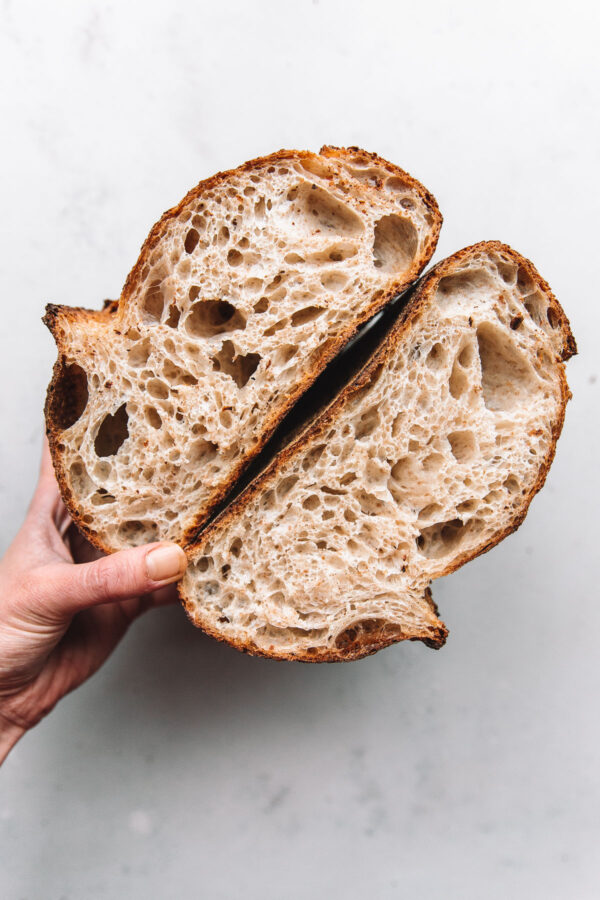
At the end of bulk fermentation, the dough should be well aerated and there will be many gas bubbles on surface, as well as on the edges of the bowl (see video). The dough should be slightly rounded on the edges of the bowl, if the dough is flat, you most likely didn’t build enough strength in the dough.
Generally, I like to end bulk fermentation when the dough is just under double in size. This has produced good results for me and this guideline works well for this specific sourdough process and timeline.

STEP 6: PRE-SHAPE
Carefully transfer the dough, without degassing, onto a clean countertop. It will be sticky. Use a bench knife to gently shape the dough into a round, pulling it gently towards you on the countertop to create some surface tension and strength.
As you do this, you’ll notice that the dough comes into a shape and starts to feel bouncy (see video). The key is to do this step quickly and as gently as possible. Rest the dough, uncovered, for 15 to 20 minutes, or until it has relaxed slightly for the final shaping.
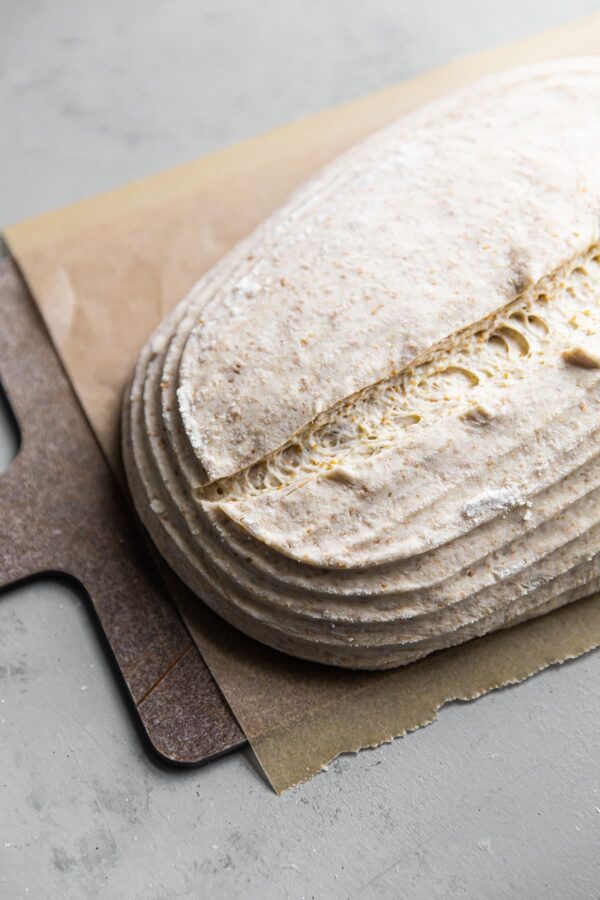
STEP 7: FINAL SHAPE
Dust the lined banneton basket lightly with rice flour. Lightly dust the surface of the dough with bread flour. Use a bench knife to gently lift it and flip it flour side-down onto your countertop. Shape into a batard (oval) (see video) or shape into a round depending on your basket and baking vessel.
Gently pick up the shaped dough, flip, and transfer into your floured banneton, with the seam side facing up. Drape a linen over the basket (to capture any condensation) and cover the banneton with a plastic bag. Seal with a clip and allow the dough to rest at room temperature for 10 minutes.

STEP 8: FINAL PROOF
Place covered banneton in the refrigerator and retard dough for 15 to 16 hours at 38°F/3°C. This slow and cold fermentation stage helps develop flavor and improves the final crust texture.
STEP 9: PREHEAT THE OVEN AND PANPreheat your Challenger Pan, Dutch Oven, or combo cooker (with lid) in a 500°F/260°C oven for at least 1 hour.
STEP 10: BAKE
Once the oven and baking vessel have preheated for an hour, remove the banneton from the refrigerator and uncover.
Poke Test: Test the dough for proper proofing by lightly flouring one small section (while the dough is still in the banneton). Press your finger lightly into dough. A properly proofed dough should very SLOWLY spring back and still leave a light indentation. That is a sign of a well proofed dough that is ready to be baked. If it springs back quickly and completely, it is under-proofed (return to the fridge, covered, for an additional hour or so). If the dough compresses and doesn’t spring back at all, it is over-proofed. Unfortunately at that point, it’s hard to make up for in that stage of the process – but it will still taste delicious!
Transfer the dough to the baking vessel – see recipe for more detailed instructions – and score the loaf with a bread lame. Please see recipe video for visual instruction. Bake at 500°F/260°C with the lid on for 25 minutes.
Remove the lid, reduce the oven temperature to 475°F/240°C (*note: if your oven runs hot or your loaves are browning too quickly, reduce the temperature to 450°F/232°C) and continue to bake uncovered for an additional 15-25 minutes or until the crust is deep golden and caramelized. I like to rotate the pan several times throughout baking to ensure even color.
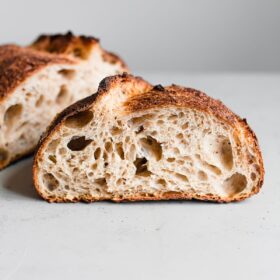
Transfer to a cooling rack and cool completely before slicing. This will take several hours. Enjoy!
Artisan Sourdough Bread Ingredients:
- 350 grams bread flour (preferably organic)
- 90 grams whole wheat flour (preferably organic and stone-ground)
- 350 grams 90°F/32°C filtered water
- 90 grams ripe sourdough starter (100% hydration)
- 9 grams kosher salt or fine sea salt
- white rice flour, for dusting
Baker’s Percentages:
Use the following baker’s percentages to tweak and adapt this sourdough bread recipe to suit your own flour, hydration, or yield preferences. Please know the timeline might change. I recommend sticking to the same salt and sourdough starter percentages.
- Bread Flour: 79.5%
- Whole Wheat Flour: 20.5%
- Water: ~79.5% (*this is a rough hydration percentage – true hydration takes into account the flour and water in your starter)
- Sourdough Starter: 20%
- Salt: 2%

Recommended Equipment and Tools:
For this recipe, you’ll need at least the following. For a complete list, please reference my guide:
- Challenger Bread Pan (a great investment), 5 Quart Dutch Oven, or Combo Cooker
- Mature Sourdough Starter
- Instant Thermometer (I highly recommend Thermopen brand for the highest quality and accuracy)
- Baking Scale
- Bench Knife
- White Rice Flour, for dusting the banneton
- 8-inch Round or 11-inch Oval Banneton Basket (I recommend one that comes with a liner, especially if you are new to sourdough baking)
- Bread Lame (or razor blade or sharp scissors), for scoring
- Serrated Bread Knife
- Advanced Equipment Recommendation: Brod & Taylor Proofing Box
Example Bread Baking Timeline:
Use the example timeline to plan your schedule for weekday or weekend sourdough baking. This timeline can also be found in the printable recipe box below.
DAY ONE:
8:30 AM – autolyse (mix flours and water). allow mixture to rest, covered, at 80°F/26°C for 1 hour, or as long as 2 hours.
9:30 AM – add mature sourdough starter, mix thoroughly. cover and rest at 80°F/26°C for 30 minutes.
10:00 AM – add salt and mix thoroughly. cover and rest at 80°F/26°C for 15 minutes.
10:15 AM – 10:45 AM – stretch and folds #1, #2, #3 (every 15 minutes). cover and rest at 80°F/26°C between each set.
11:15 AM – 12:15 PM – stretch and folds #4, #5, #6 (every 30 minutes). cover and rest at 80°F/26°C between each set.
12:15 PM – 2:15/3:15 PM – allow dough to rest, covered, at 80°F/26°C for the rest of the bulk fermentation period. this period will range from 1.5 – 2 hours (or much longer), depending on ambient temperature, starter strength, and flour variety. generally, I like to end bulk fermentation when the dough is just under double in size. This has produced good results for me and this guideline works well for this specific sourdough process and timeline.
2:15/3:15 PM – pre-shape. leave uncovered at room temperature for 20 minutes.
2:35/3:35 PM – final shape. transfer to rice floured banneton basket, cover with a plastic bag, and seal. allow to rest at room temperature for 10 minutes before transferring to the fridge.
3:45 PM – 7:45 AM – retard dough (final proof) in refrigerator at 38°F/3°C for 16-17 hours.
DAY TWO:
6:45 AM – preheat Challenger Pan, Dutch Oven, or combo cooker in 500°F/260°C oven for at least 1 hour.
7:45 AM – remove dough from the fridge, transfer to preheated pan, score, and bake at 500°F/260°C with the lid on for 25 minutes.
8:10 AM – remove pan lid, reduce oven temperature to 475°F/245°C and bake uncovered for about 20 minutes or until deeply caramelized. allow loaf to cool completely – this will take several hours – before slicing and serving.
How to Store Sourdough Bread:
You’ll be amazed by how quickly you go through a loaf. If you do happen to have leftovers, please reference my guide on how to store bread.
It covers the basics on the best way to store, refresh, and freeze artisanal sourdough bread.
Troubleshooting Issues and FAQ:
If you’re experiencing troubleshooting issues with this recipe or other sourdough baking, please check out my Sourdough Bread Troubleshooting Guide.
Artisan Sourdough Bread Recipe
Ingredients
- 350 grams unbleached bread flour preferably organic, plus more for dusting
- 90 grams whole wheat flour preferably organic
- 350 grams 90°F/32°C filtered water
- 90 grams ripe sourdough starter 100% hydration
- 9 grams Diamond Crystal kosher salt or fine sea salt
- white rice flour for dusting your banneton basket
Instructions
- New to sourdough baking? I highly recommend reducing the hydration in this recipe if you are new to sourdough baking. This is a high hydration dough and can be challenging to work with (and build strength in) if you're not an experienced baker. If you're looking for an easier to handle dough, I recommend reducing the water to 310 to 330 grams total. If you're working with a lower hydration, you may be able to get away with just 3 to 4 sets of stretch and folds, or even less. Follow the dough's lead!
- IMPORTANT NOTE: I do not prepare an off-shoot levain for my sourdough baking, as this baking timeline and method works well for my schedule, as well as my starter's feeding schedule. This choice is up to you and can be adapted/tweaked to fix your schedule, but please plan accordingly. Keep in mind that you'll need to account for the starter quantity in the recipe (90 grams), as well as the normal quantity needed to continue to maintain and feed your starter.
- Autolyse: In a large mixing bowl, whisk together 350 grams unbleached bread flour and 90 grams whole wheat flour. Add 350 grams (90°F/32°C) filtered water and mix with your hands until thoroughly combined and no dry bits are visible. Cover with a clean shower cap or plastic wrap, and rest at 80°F/26°C for 1 hour or up to 2 hours. This step hydrates the flours and helps build dough structure.
- Add Starter and Rest: While this test isn't fool-proof, your sourdough starter should pass the 'float test' when it's ready. Place a tiny spoonful of your ripe starter in a jar of water, it should float to the top. If it sinks, give it more time (15 to 20 minutes) and test again. Add 90 grams ripe sourdough starter and spread it over the autolyse mixture. Use your fingertips to spread the starter over the autolyse mixture. Fold the edges of the dough into the center to fully incorporate the starter. Use your thumb and fingers to pinch the dough (pincer method) repeatedly until the starter is well incorporated. Don’t be delicate. You want to work quickly, but fully incorporate the mixture. Cover and rest at 80°F/26°C for 30 minutes.
- Add Salt and Rest: Sprinkle 9 grams salt over the surface of the dough. Use your thumb and fingers to pinch and incorporate the salt thoroughly (you shouldn't feel any granules at the end of mixing) into the dough. Depending on the coarseness of your salt, this might take a couple minutes. Be thorough. Cover and rest at 80°F/26°C for 15 minutes. Important Note and Tip: If you’re struggling with higher hydration doughs and dough strength, there are two additional mixing methods that you can try: slap and fold or the Rubaud method. Please see the full video included in this post for visual demonstration.
- Bulk Fermentation: We will preform a total of 6 sets of stretch and folds (see article above for further instruction) in the first two hours of bulk fermentation. The first three will take place in 15-minute intervals. The remaining three will occur in 30-minute intervals. Covering and rest the dough at 80°F/26°C between each set. The dough will not rise much during the stretch and fold period, but it should get considerably stronger. Dip your hands in water (to prevent sticking) before each fold. I like to rub my hands together to avoid incorporating much more water, as this is already a high hydration dough. How to Preform a Stretch and Fold: Grab the top portion of the dough with both hands. Gently pull and stretch it upwards (without tearing) and fold over the opposite edge. Rotate the bowl 180 degrees and repeat from the other side. Rotate the bowl 90 degrees and repeat once again on both sides. This entire process is one stretch and fold set. After performing the stretch and folds, I like to gently lift the dough to round it nicely in the bowl (see video). *If your dough is developing quickly, you can reduce the total number of stretch and folds to 3 or 4 sets, 30 minutes apart.
- Bulk Fermentation (continued): Allow the dough to rest, covered at 80°F/26°C, for an additional 1.5 - 2 hours after the last stretch and fold - watch it carefully. Generally, I like to end bulk fermentation when the dough is just under double in size. This has produced good results for me and this guideline works well for this specific sourdough process and timeline. The total bulk fermentation time will vary tremendously based on your ambient kitchen temperature, dough temperature (FDT), flour type, and several other factors, so watch it carefully. Judging the right point to end bulk fermentation and move to the pre-shape period requires practice and trial-and-error. At the end of bulk fermentation, the dough should be well aerated and there will be many gas bubbles on surface, as well as on the edges of the bowl (see video). The dough should be slightly rounded on the edges of the bowl. If the dough is flat, you most likely didn’t build enough strength during mixing, stretch and folds, or bulk.
- Pre-Shape: Transfer the dough, without degassing, onto a clean countertop. It will be sticky. Use a bench knife to gently shape the dough into a round, pulling it gently towards you on the countertop in a circle to create some tension on the skin of the dough. As you do this, you’ll notice that the dough comes into a shape and starts to feel bouncy (see video). The key is to do this as quickly and gently as possible. Rest the dough, uncovered, for 15 to 20 minutes, or until it has relaxed slightly for the final shaping. Pre-shaping gives the dough some extra tension and strength (and is particularly important if you are doubling the recipe and preparing two loaves, as you'll need to divide it prior). Allowing it to rest allows the gluten to relax slightly before preforming the final shape.
- Final Shape: Dust a 9-inch round or 10 or 11-inch oval banneton basket with rice flour (be extra liberal if you are not using a cloth or linen liner). Dust the surface of the dough lightly with bread flour. Use a bench knife to gently lift and flip it flour side down onto your countertop. Depending on your preference, banneton, or baking vessel, shape the dough into a round or batard. *Tip: Please watch the video above for visuals on how to shape a batard (oval loaf) or my latest video on how to shape rounds (boules) and bake in a Dutch oven. After shaping, gently pick up the shaped dough, flip, and transfer into your floured banneton, with the seam side facing up. Drape a kitchen linen over the banneton and place the banneton in a plastic bag (*I use a clean plastic produce bag). Seal with a clip and allow the dough to rest at room temperature for 10 minutes.
- Final Proof: Place covered banneton basket in the refrigerator and retard dough for 15-16 hours at 38°F/3°C. This slow and cold fermentation stage helps develop flavor and improves the final crust texture.
- Preheat the Oven: Preheat your Challenger Pan, Dutch Oven, or combo cooker (with lid on) in a 500°F/260°C oven for at least 1 hour.
- Poke Test for Proofing: Once the oven and baking vessel have preheated for an hour, remove the banneton from the fridge and uncover. Test the dough for proper proofing by lightly flouring one small section (while the dough is still in the banneton). Press your finger lightly into the dough. A properly proofed dough should very SLOWLY spring back and still leave a light indentation. That is a sign of a well proofed dough that is ready to be baked. If it springs back quickly and completely, it is under-proofed (return to the fridge, covered, for an additional hour or so). If the dough compresses and doesn’t spring back at all, it is over-proofed. Unfortunately at that point, it’s hard to make up for in that stage of the process - but it will still taste delicious!
- Transfer and Bake: If you are using a Challenger Pan or combo cooker, you can skip parchment and carefully invert the basket directly into the preheated base before scoring. If you are using a traditional Dutch oven, please watch this video for visuals: Place a large piece of parchment over the banneton, then top with a thin cutting board. Invert and flip carefully, so that the banneton is upside down, setting it down onto your countertop. The dough should release, right side up, from the banneton onto the parchment. Trim any excess parchment paper, creating two handles on both ends for lifting the dough. Use a bread lame to score the dough (1/2-inch deep), carefully transfer into the preheated pan, cover tightly with the lid, and place in the oven. Bake covered at 500°F/260°C for 25 minutes.
- Remove the lid. The dough should have risen and expanded considerably, and the crust should be set, but only lightly golden in color.
- Reduce the oven temperature to 475°F/240°C (*note: if your oven runs hot or your loaves are browning too quickly, reduce the temperature to 450°F/232°C) and continue to bake uncovered for an additional 15-25 minutes or longer until the crust is deep golden and caramelized. I like to rotate the pan several times during this final stage to ensure even browning.
- Carefully remove the bread from the pan and transfer to a cooling rack. Cool completely before slicing. This will take several hours. Slicing into warm bread will result in a gummier texture and cause the bread to stale faster. For more tips, read this guide on how to store, freeze, and refresh sourdough.
How to Adapt This Recipe:
- Feel free to adjust the flour type percentages and hydration to suit your preferences, using the same total flour weight as a guide. Higher quantities of whole grain flours will yield a denser, less open crumb and will affect total bulk fermentation time.
Example Baking Timeline:
- DAY ONE: 8:30 AM - autolyse (mix flours and water). allow mixture to rest, covered, at 80°F/26°C for at least 1 hour or up to 2 hours. 9:30 AM - add sourdough starter, mix thoroughly. cover and rest at 80°F/26°C for 30 minutes. 10:00 AM - add salt and mix thoroughly. cover and rest at 80°F/26°C for 15 minutes. 10:15 AM - 10:45 AM - stretch and folds #1, #2, #3 (every 15 minutes). cover and rest at 80°F/26°C between each set. 11:15 AM - 12:15 PM - stretch and folds #4, #5, #6 (every 30 minutes). cover and rest at 80°F/26°C between each set. 12:15 PM - 2:15/3:15 PM - allow to rest, covered, at 80°F/26°C for the rest of the bulk fermentation period. this period will range anywhere from 1.5 to 2 (or significantly longer), depending on ambient temperature, starter strength, and flour variety. follow the dough's lead! 2:15/3:15 PM - pre-shape. leave uncovered at room temperature for 20 minutes. 2:35/3:35 PM - final shape. transfer to rice floured banneton basket, cover with a plastic bag, and seal. allow to rest at room temperature for 10 minutes before transferring to the fridge. 3:45 PM - 7:45 AM - retard dough (final proof) in refrigerator at 38°F/3°C for about 16 hours.
- DAY TWO: 6:45 AM - preheat challenger pan, Dutch Oven, or combo cooker in 500F oven for at least 1 hour. 7:45 AM - remove banneton from fridge, transfer dough to preheated pan, score, and bake at 500°F/260°C, covered, for 25 minutes. 8:10 AM - remove pan lid, reduce oven temperature to 475°F/240°C, and bake uncovered for an additional 20 minutes or until deeply caramelized. allow loaf to cool completely (this will take several hours) before slicing.
281 Comments on “Artisan Sourdough Bread Recipe”
Very well done. Hope it helps my baking journey.
Hello! What is the protein percentage of your bread flour? Thank you!
Every bread flour is a little bit different, but King Arthur brand is 12.7%
It is very refreshing to see an American chef / recipe using European (S.I.) units for weight and temperature. I wish American created recipes would all offer both US and Euopean units, rather than subjective volume measurements only.
I finally made a great loaf of bread thanks to this recipe and video! So grateful. Feeding my spurdough twice before use and using a proofer really made this much better.
After 2 epic failed attempts to make a high hydration Open Crumb loaf, I was finally successful following you recipe and techniques. THANK YOU!!!! It was so much easier than the other methods I used and honestly well worth it. I greatly appreciated the video as well to help me through each step. It took me 9 stretch and folds but we got there in the end!!
So glad to hear this! Thanks for the review!
If I don’t want to use Ripe sourdough starter, how many instant yeast I can use..?.
Hi! This is a recipe designed for sourdough starter, not commercial yeast. I recommend finding another recipe that was tested with commercial yeast, as it’s not as simple as a substitute – and the results will not come out well.
Your nutrition facts say “one serving” but what is one serving ?? Do you have a measurement
Never mind my bread loaf came out perfect!! Thank for this recipe
Hello – not tried this recipe but I was wondering – I have a steam oven and was hoping to attempt baking my sourdough in this – any idea on what hydration I would set it to? I’m assuming I would need to set it to 80-100% then turn off the hydration for the last ten minutes or so?
Thank you! Excited to give it a try
Hi! I’ve never used a steam oven, so I honestly am not sure what setting would most closely mimic a Dutch oven covered. I would go with your instincts (maybe do a quick google?) and you might have to play around with this. I would still probably recommend no steam for longer than 10 minutes?
Webpage is too crowded with ads and recipe is so convoluted. Simple language would make this so much easier to follow. This webpage is embarrassing . Hope the author is rolling in mountains of money cuz the recipes are useless.
Just press “jump to recipe” and then print the recipe if you don’t like following it on your computer or phone. Also, sourdough IS complicated and I’ve included an enormous amount of free content/resources in this article, so it cannot be a short post.
This has been the process that has made me love the process of making sourdough and it is so flavorful and delicious. THANK YOU for this tutorial. I’ve been using it for years and only now leaving a comment.
Love the video to follow, step-by-step!
Would like to know if the cold fermentation in the fridge could be skipped? If so, how would one proceed?
I am new to sourdough! Have failed two attempts at breads so far…I think because my Starter wasn’t strong enough to rise the dough.
I am now about 45 days into my starters and have learned how to strengthen them! Hopefully I also understand now when they are ready to use for recipes!! 🤞🏻
I’m ready to attempt another loaf. Have read that cold fermentation adds to the sour of the bread? I would like less sour bread and that is why I am asking about skipping that step.
Could you also share some other recipes you may have that skip the cold fermentation?
Any advice or direction would be greatly appreciated!! Thank you!
Hi Tiffany, sorry for the late reply! You definitely don’t have to do the cold fermentation, but it is pretty integral to this particular recipe and it lends a huge amount of flavor to the dough, improves the crumb, and makes transferring it to the Dutch oven significantly easier (as opposed to dealing with warm dough).
This bread really isn’t sour in my opinion – or sour in the way that some people think of when they think of sourdough bread. None of my personal bread recipe skip the cold fermentation step, so I can’t point you to any of my own at this point in time.
What a masterful tutorial. I’ve used this recipe time and time again. Anytime I seem to stray from it I tend to sneak back into Laura’s arms ready for consistency, time tested recipes and beautiful crafted food. SO grateful for this and many many of her recipes to bring into my own kitchen.