Sourdough Pizza Dough
A step-by-step guide on how to make sourdough pizza dough, including a recipe for a classic Margherita-style pizza.

Despite my passion for sourdough bread, homemade sourdough pizza is undoubtedly the biggest perk of maintaining a sourdough starter. Not only is sourdough pizza much easier to master, it will transform your dinner game.
This irresistible sourdough pizza dough is naturally leavened and prepared with a combination of Type “00” flour (strong, finely ground flour typically used for pizza and homemade pasta) and high-protein bread flour.
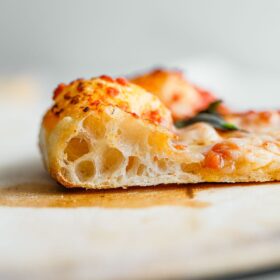
This makes a delightfully crisp and chewy, yet tender crust with a signature sourdough tang. So much flavor in every bite.
After testing various pizza recipes over the years, this is the formula that we come back to over and over again. It is easy to make and produces consistently delicious restaurant-worthy pizza.
In fact, you’ll quickly become spoiled for life. It is a bit of a problem.
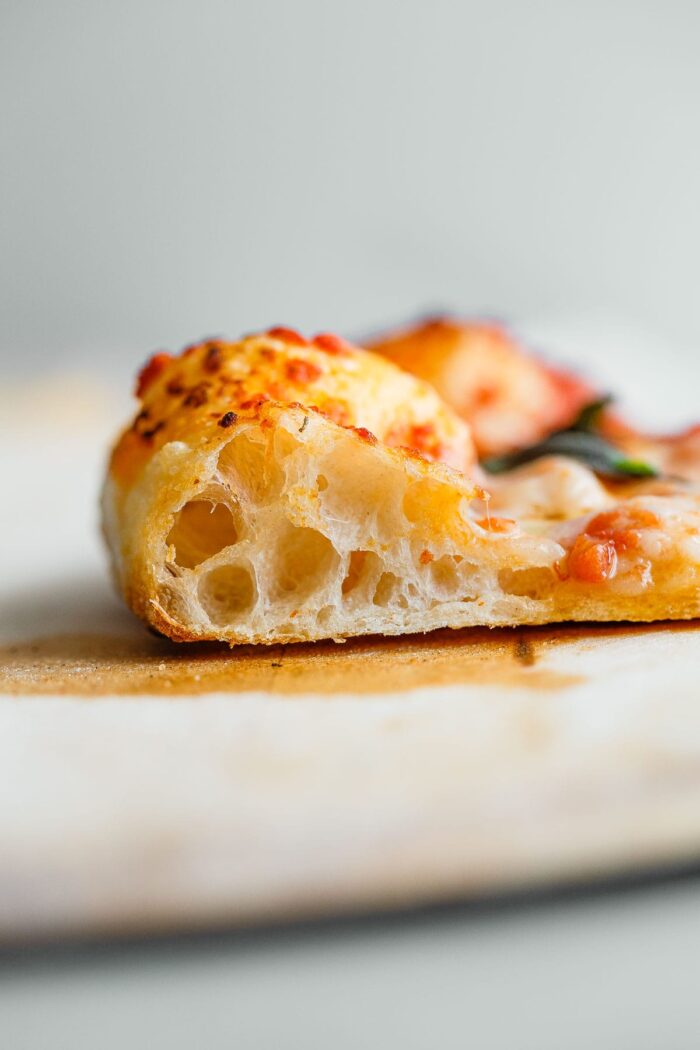
Sourdough Pizza Dough Ingredients:
Yields Three (10-Inch) Pizzas
- 225 grams 90°F-95°F filtered water (32°C-35°C)
- 15 grams salt
- 250 grams ripe sourdough starter (100% hydration)
- 250 grams type “00” flour I’ve tested this formula extensively with Central Milling and on occasion Caputo
- 125 grams high-protein bread flour I recommend King Arthur brand
How to Make Sourdough Pizza Dough:
For in-depth instructions, equipment recommendations, and an example baking timeline, please reference the full recipe at the bottom of this post.
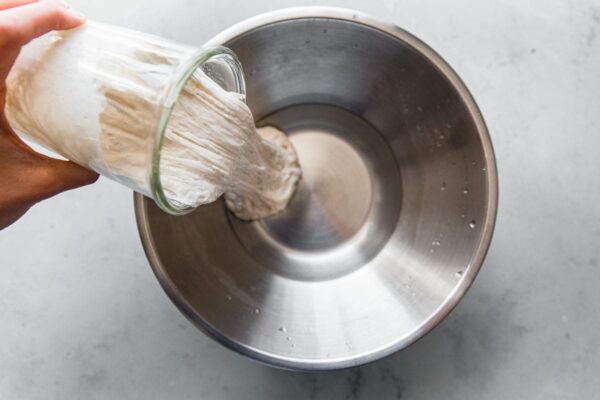
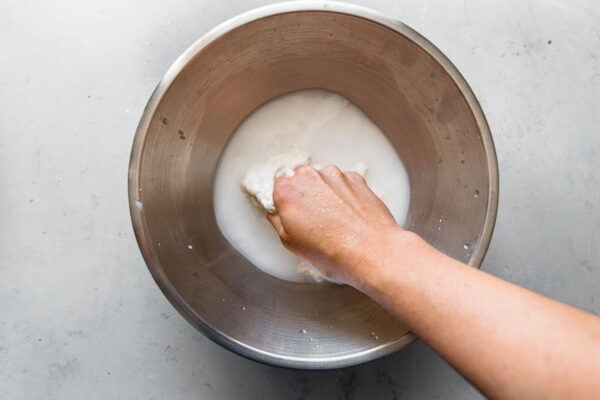
Step 1: Combine the water and salt together in a large mixing bowl. Mix until the salt has completely dissolved. Add the ripe sourdough starter. Using your hands, pinch the starter into the water mixture until it is broken into small clumps throughout.
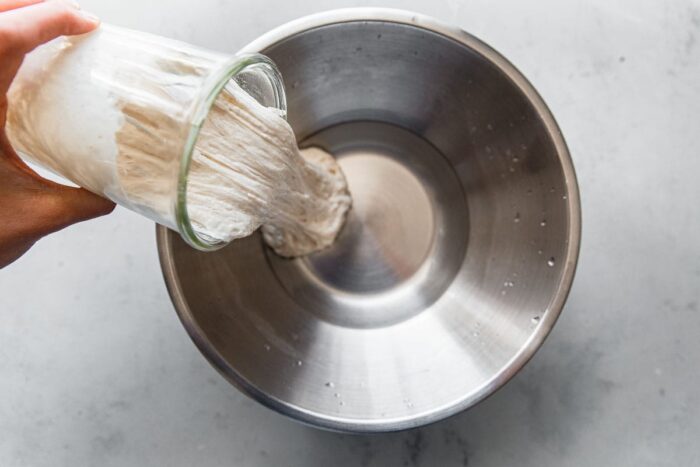
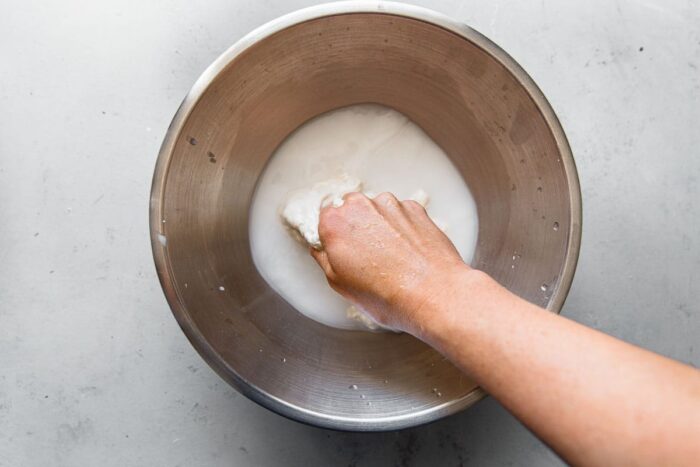
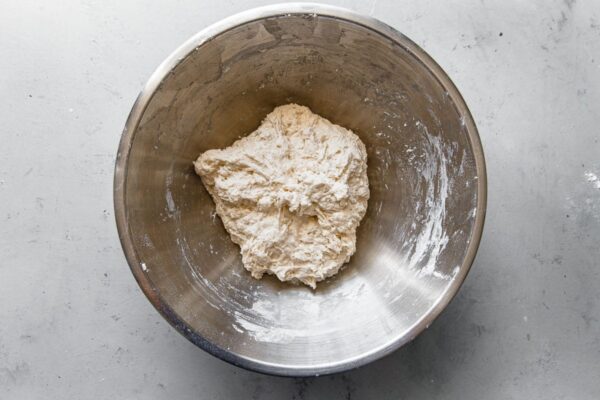
Step 2: Add the “00” flour and bread flour to the bowl. Using a Danish dough whisk or your hands, mix the ingredients together until thoroughly mixed, and no dry bits or lumps remain. The dough will be shaggy. Cover the bowl and rest at room temperature for 20 minutes.
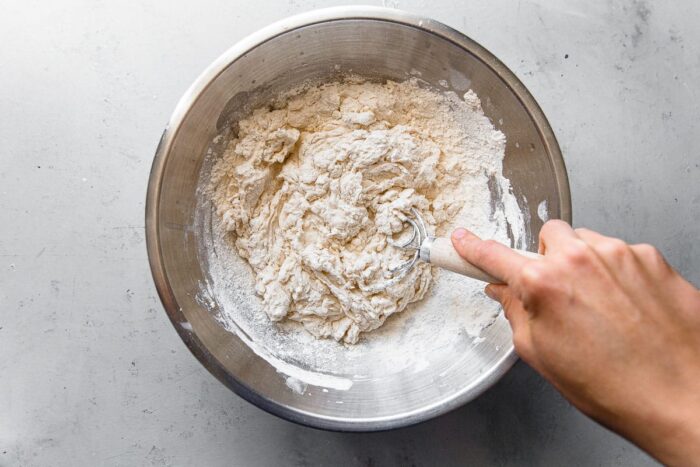
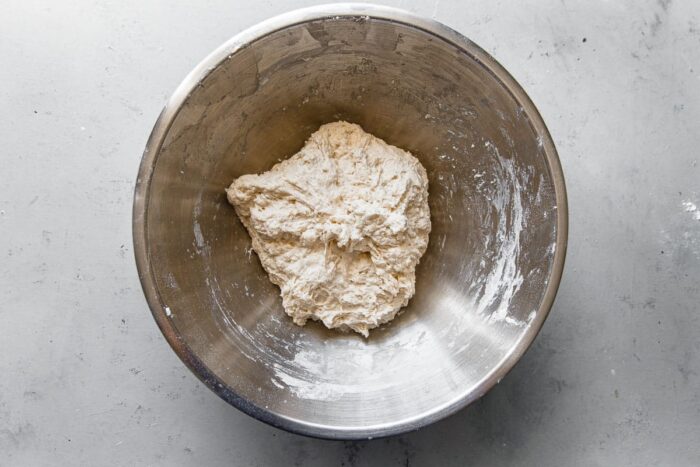
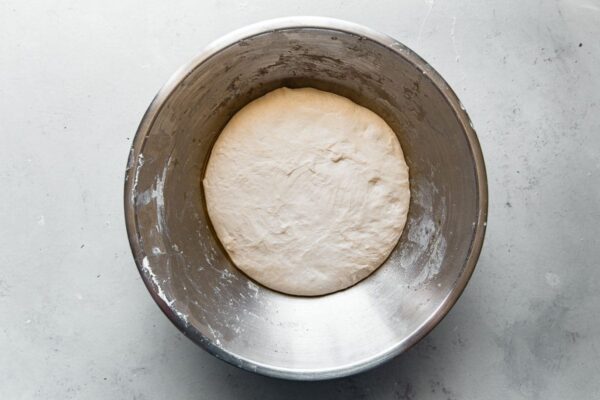
Step 3: Transfer the dough to a lightly floured countertop and knead for 1 minute or so, or until the dough is mostly smooth. Lightly grease the mixing bowl with olive oil and place the dough back into the bowl. Cover and proof at room temperature for about 3 hours. It should have risen about 50% and be smooth and rounded on the edges.
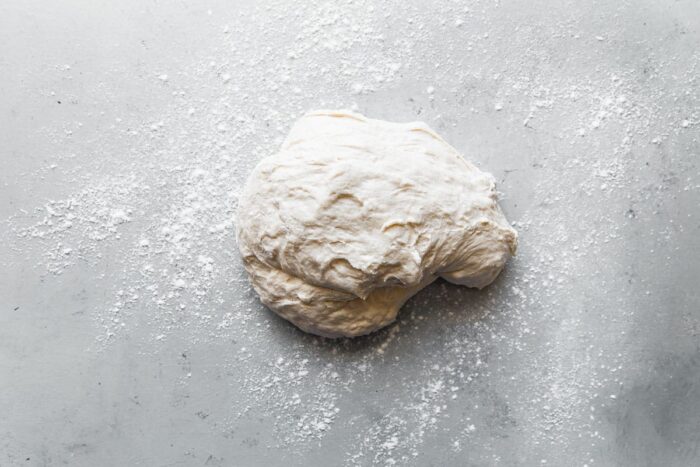
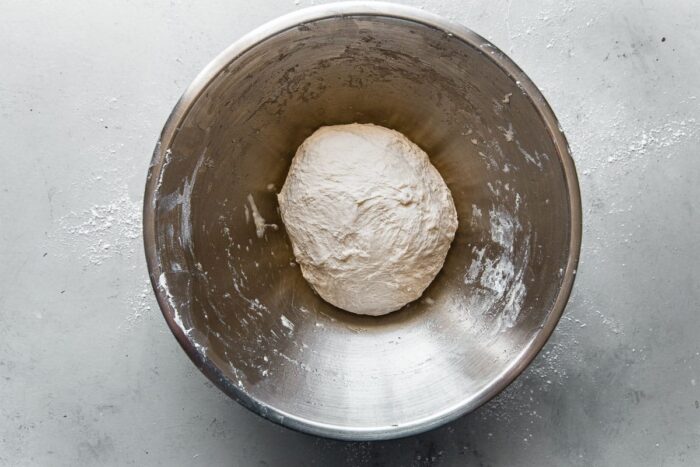
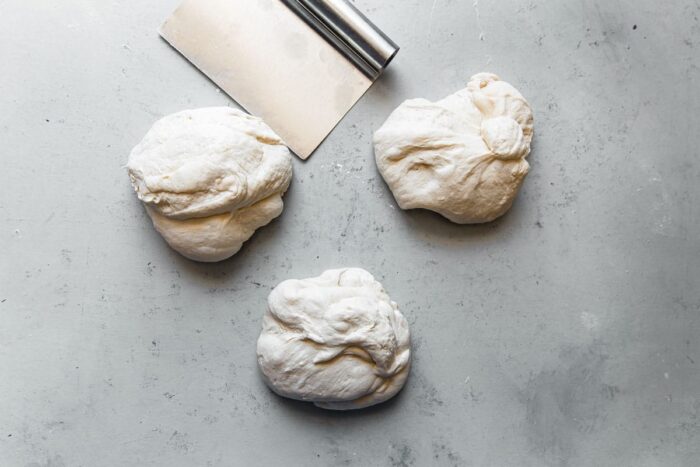
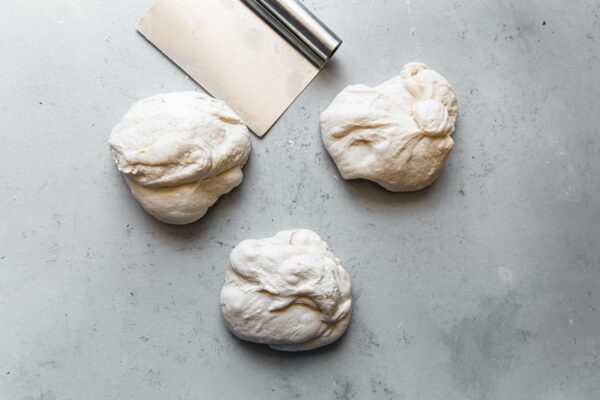
Step 4: Transfer the dough to a clean countertop. Using a bench knife, divide the dough into three equal pieces (roughly 280 grams each).
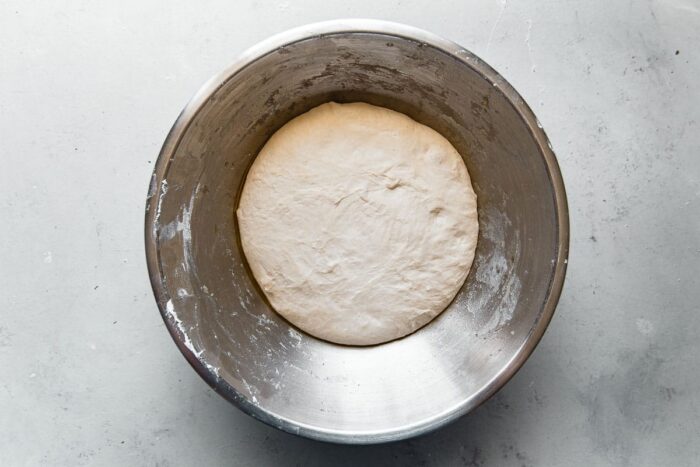
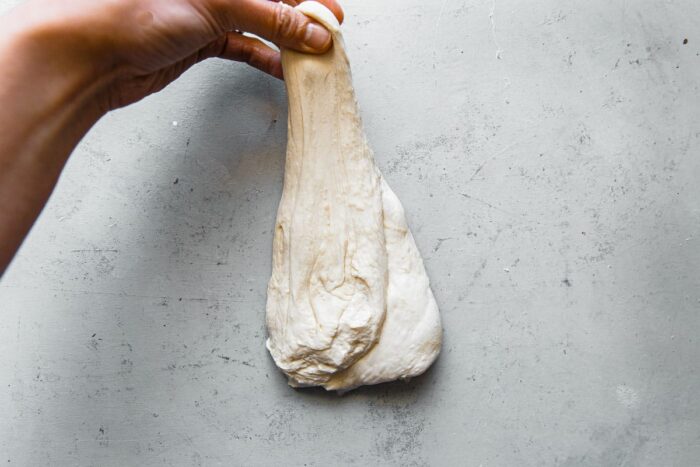
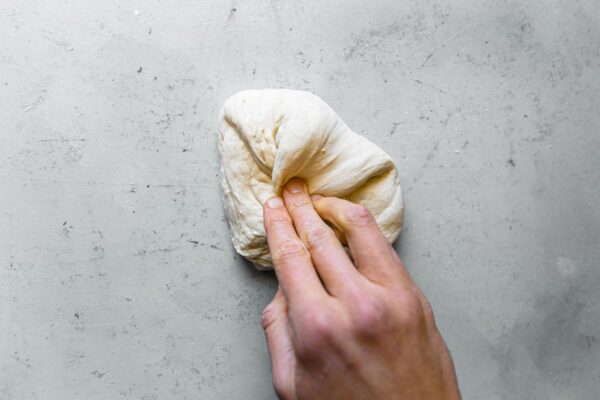
Step 5: Shape the pizza dough pieces into balls. Working with one piece of dough at a time, grab the top portion of dough, stretch upwards, then fold back into the center. Repeat from the opposite edge. Continue along the outer edges of the dough, folding them back into the center to form a tightly seamed package.
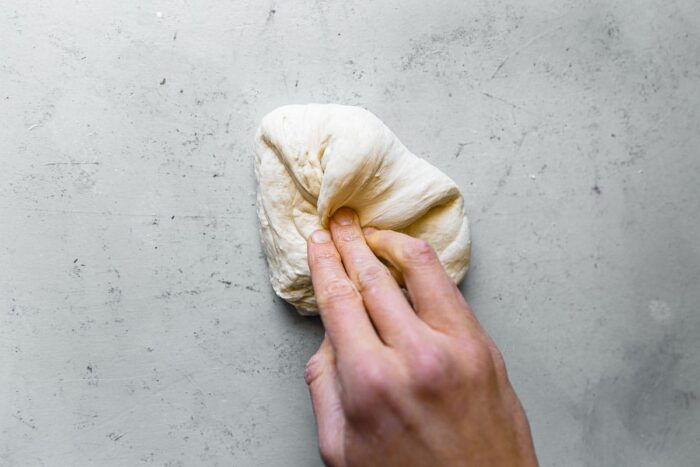
Step 6: Flip the dough seam-side down and use your hands to gently shape into a round, using the countertop to build tension into the surface of the dough. Repeat with the remaining dough pieces.
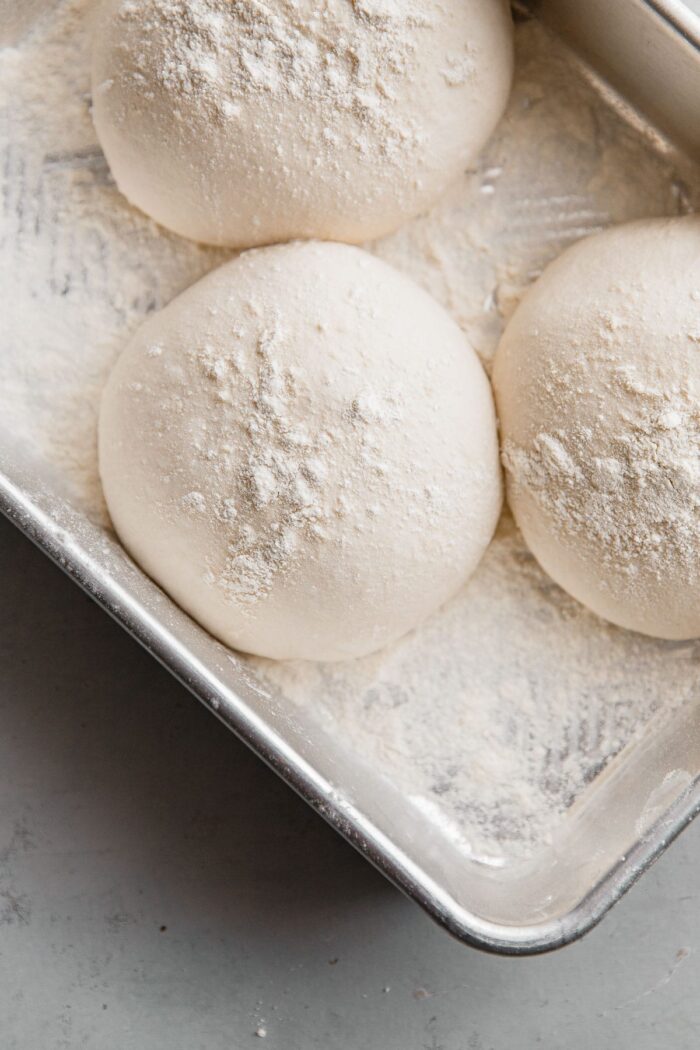
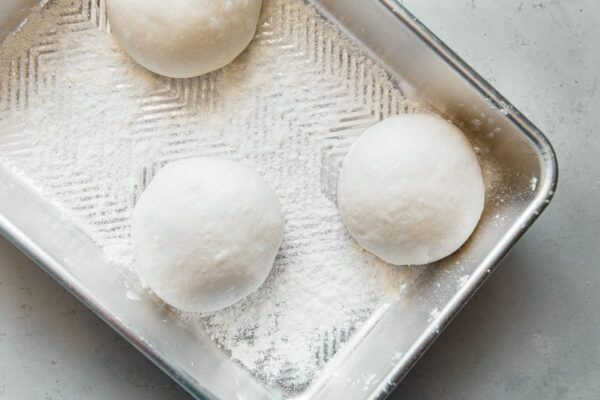
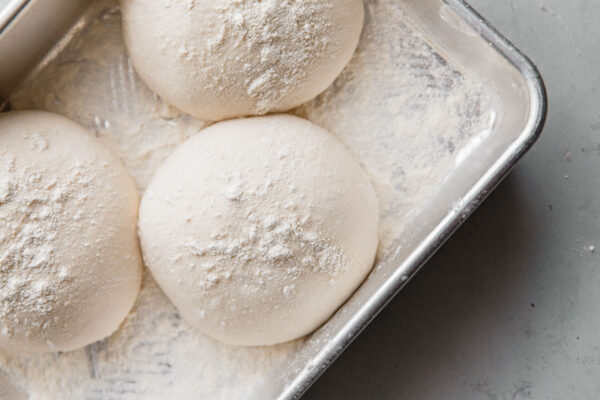
Transfer the dough balls into a flour dusted proofing box (or rectangular pan with lid or large plate), setting them apart. Dust with flour. Cover and rest at room temperature for a minimum of 5 to 6 hours or until ready to assemble or bake pizza that evening. The dough will hold for 3 to 4 additional hours after proofing.
See full recipe and notes for make-ahead instructions.
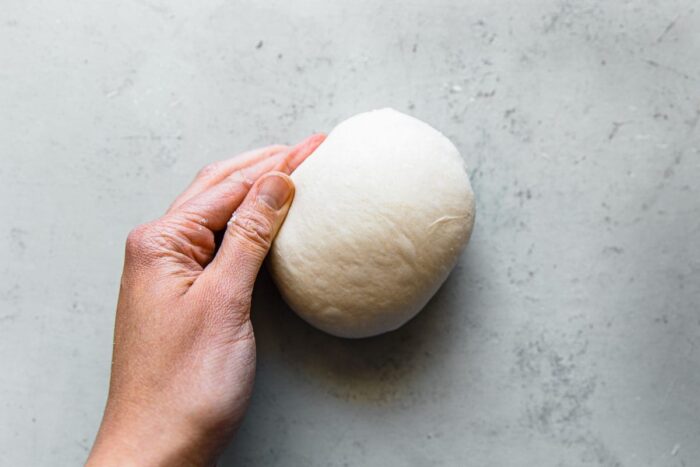
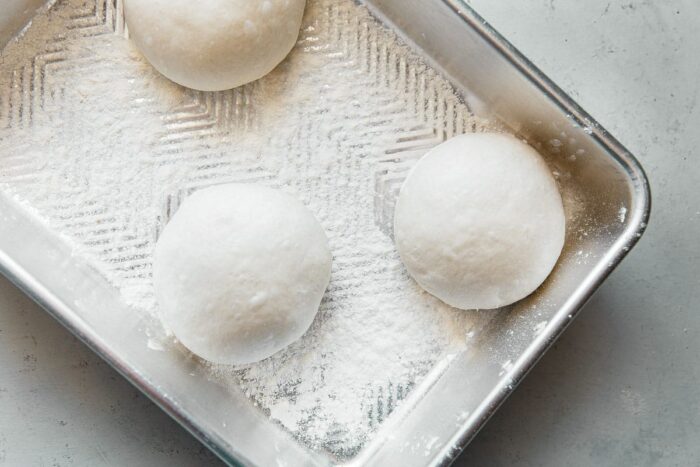
Step 7: After the final proof, the dough balls should have expanded considerably – they will most likely be touching – and nearly doubled in size. Shape and bake using the instructions and recipe below.

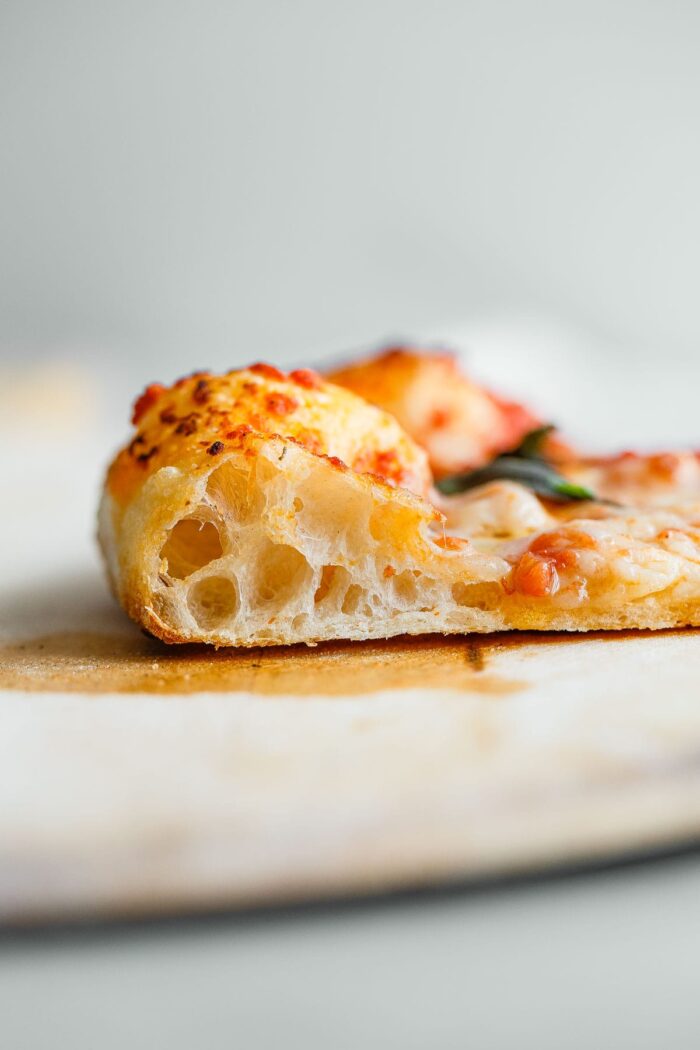
How to Shape and Make Sourdough Pizza:
Once you’ve prepared the sourdough pizza dough, it’s time to make pizza!
To make a Margherita-style pizza, you’ll need only a handful of ingredients: homemade pizza sauce, fresh mozzarella cheese, fresh basil, and extra virgin olive oil. This produces a classic pizza, which is absolutely irresistible.
For additional guidance on shaping pizza dough, watch this quick step-by-step video series.
Step 1: Set a baking steel on a rack in the upper third of the oven, roughly 6 to 7 inches below the broiler element. Preheat the oven and steel to 500°F (260°C) for at least one hour. Prepare the pizza sauce, toppings, and set out for easy assembly.
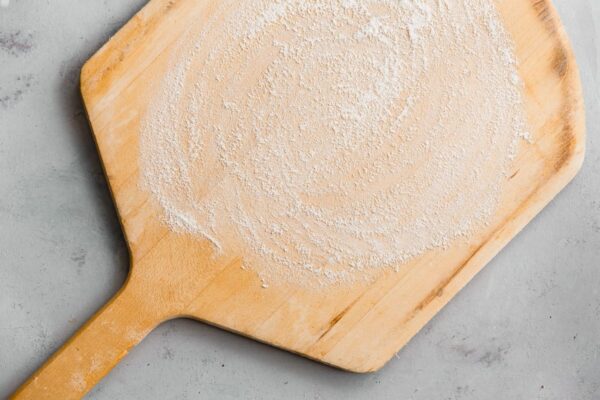
Step 2: Lightly dust a pizza peel with flour and sprinkle with semolina flour. This mixture will keep your dough from sticking and help with transferring. Use your hands to spread the mixture into a thin layer across the surface of the peel.
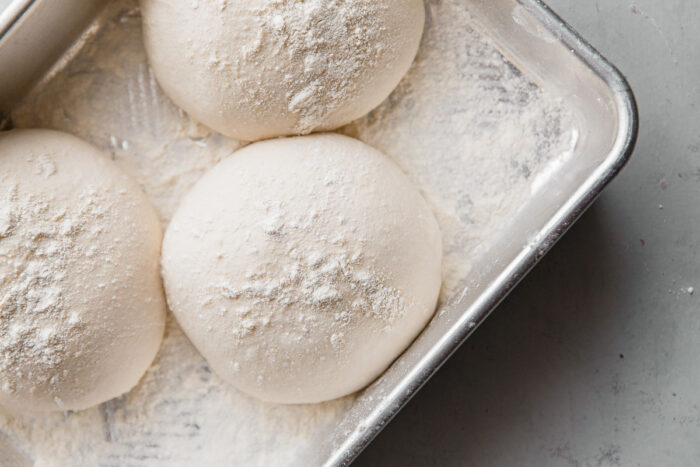
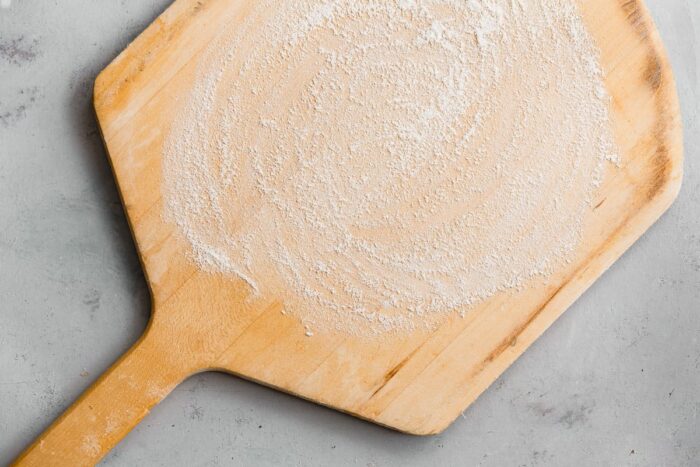
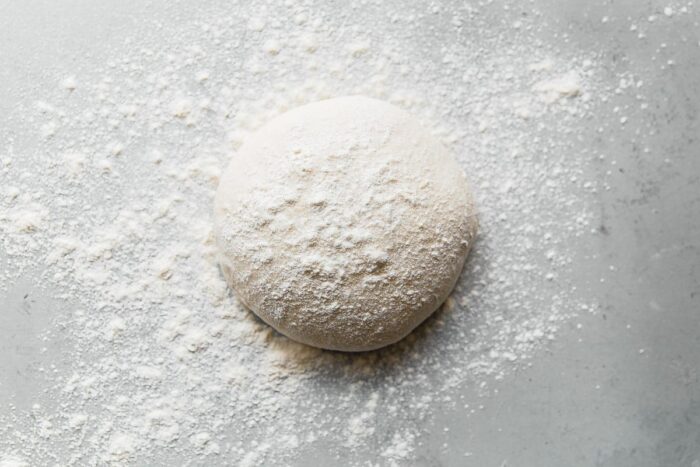
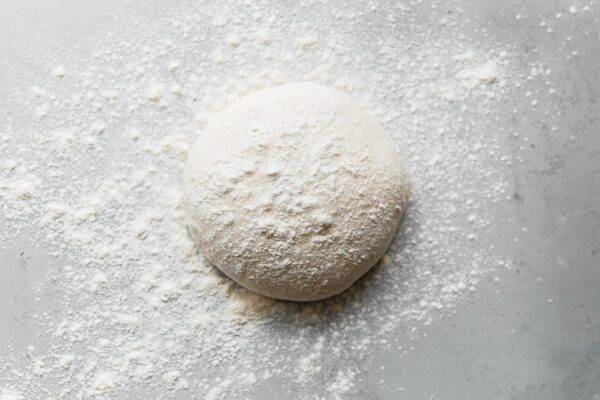
Step 3: Just before assembling pizza, turn the oven broiler to high for 10 minutes. This will blast your steel with an extra dose of heat. Generously sprinkle your countertop with flour. Carefully lift one pizza dough round from the proofing container (covering the remaining dough once again) and set on the flour. Dust the top with flour.
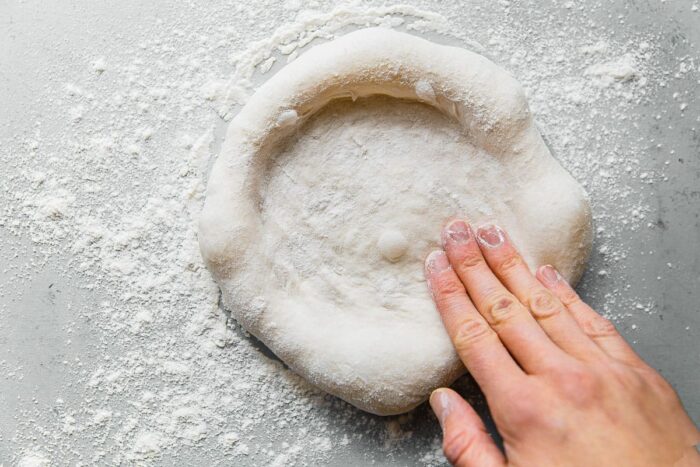
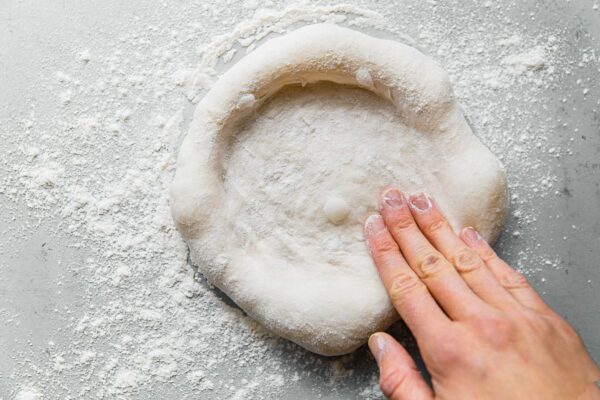
Step 4: Using both hands, press the dough with your fingers, starting from the center and pressing outwards toward the edges, rotating the dough as you go while maintaining the edges.
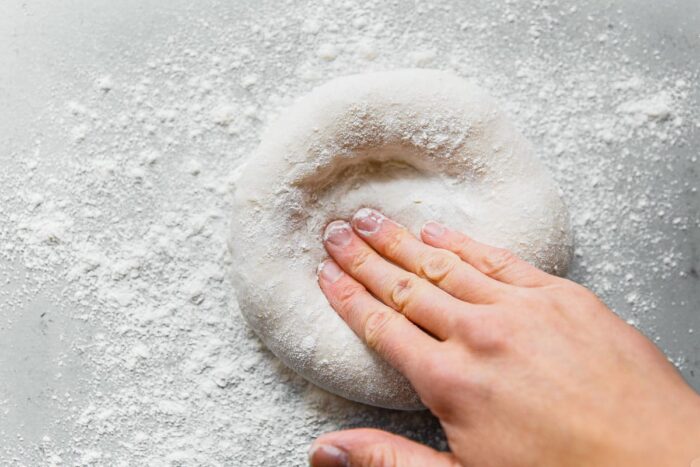
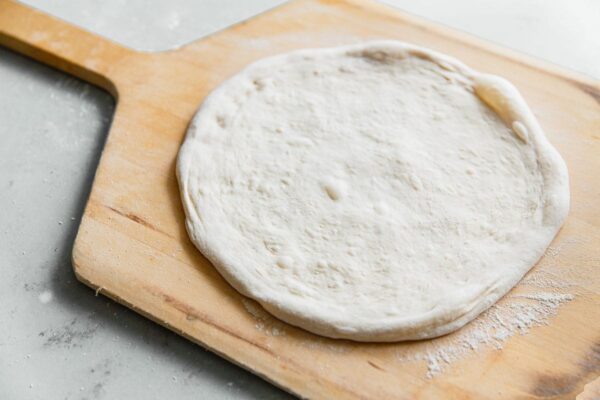
Step 5: Once the disc is about 6 to 7 inches in diameter, lift the dough with both hands, allowing the center of the dough to rest on your knuckles. Gently stretch the dough by pushing your knuckles outwards, rotating the dough continuously, while maintaining the rounded edges of the crust. Allow the outer edges of the dough to hang off your hands, allowing gravity to help stretch the dough into a thin disc, roughly 10-inches in diameter. Gently transfer the dough onto the dusted pizza peel.
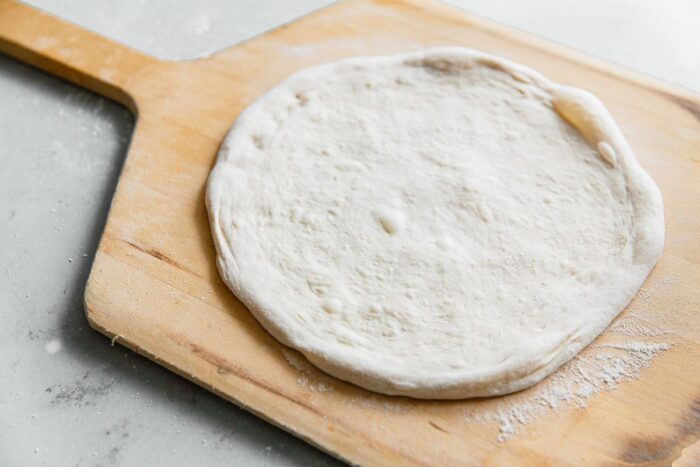
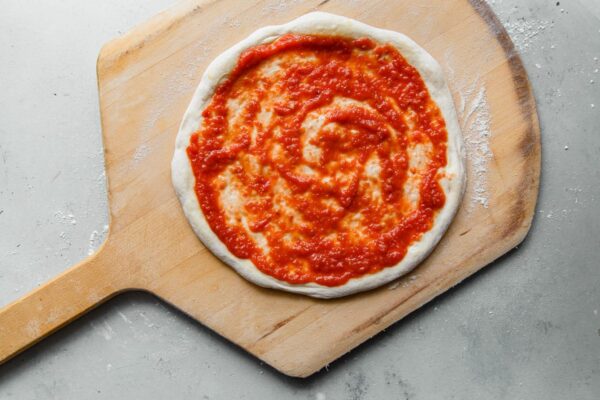
Step 6: Drizzle the surface of the dough with extra virgin olive oil. Use your hands to brush it over the surface of the dough, concentrating on the edges. Spoon roughly ⅓ to ½ cup of pizza sauce in the center. Use the back of a spoon to spread the sauce into an even thin layer, leaving a ¾-inch border on all sides.
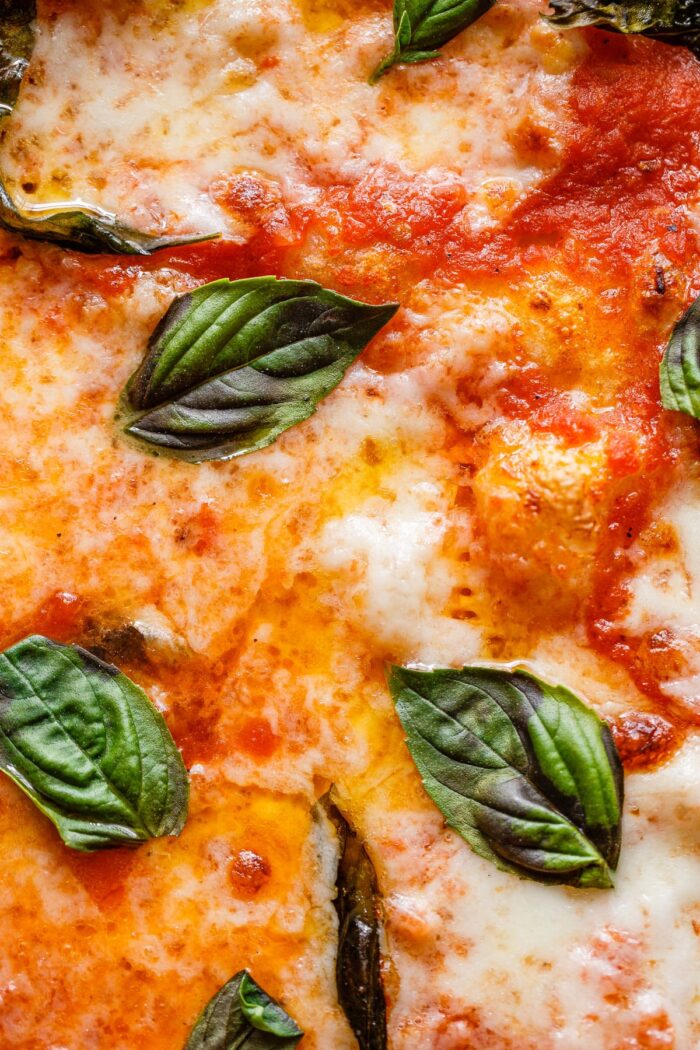
Step 7: Distribute torn mozzarella pieces (roughly ⅓ of the 8-ounce mozzarella ball) over the sauce and top with several torn basil leaves.
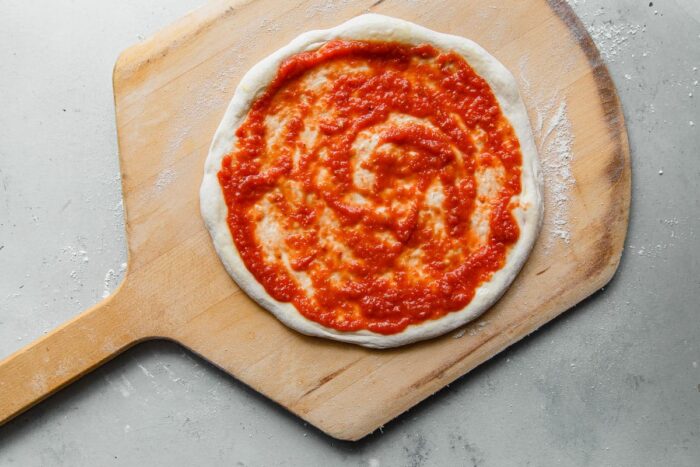

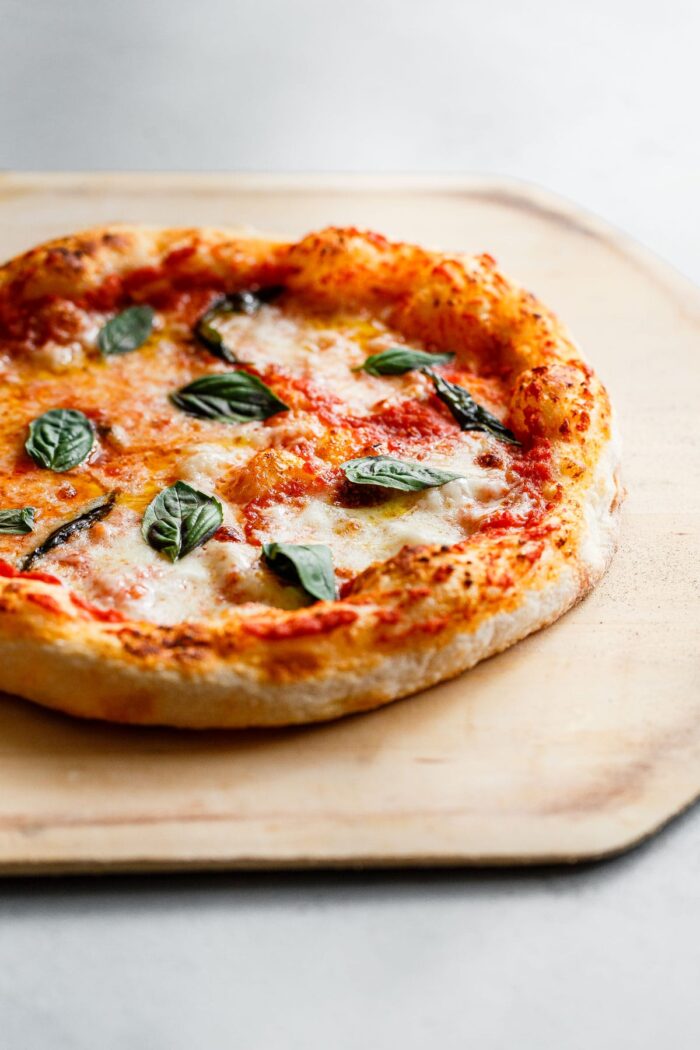
Step 8: Transfer the pizza onto the hot baking steel. Immediately turn off the broiler and set the oven to 500°F (260°C). Cook the pizza for 4 to 5 minutes, rotating it on the steel once or twice if needed, or until the bottom is crisp and lightly spotted. Finish the pizza under the broiler, watching carefully, or until the edges of the crust have gained color.

Step 9: Remove from the oven, place on a wooden cutting board. Lightly drizzle with extra virgin olive oil, fresh basil leaves, and freshly grated parmigiano-reggiano cheese (if desired). Cut into quarters and serve immediately.
Set the oven back to temperature and repeat with the remaining pizza dough, assembling and baking each pizza before serving.
Pizza Topping Variations:
Use the classic pizza topping formula below, including our favorite pizza sauce, as a base and mix up the toppings as desired.
Personal Favorites: Calabrian chiles, roasted mushrooms, anchovies, Calabrese salami, kalamata olives, and fresh arugula, just to name a few. Or use sourdough pizza dough to elevate this mushroom pizza or lemon truffle arugula pizza.

Sourdough Pizza Dough
Ingredients
Sourdough Pizza Dough:
- 225 grams 90°F-95°F filtered water (32°C-35°C)
- 15 grams kosher salt
- 250 grams ripe sourdough starter 100% hydration
- 250 grams type "00" flour plus more for dusting, I've tested this with Central Milling extensively, but Caputo brand is another good option (see notes)
- 125 grams bread flour such as King Arthur
Assembly and Toppings (For Three 10-Inch Margherita-Style Pizzas):
- flour for shaping and dusting
- semolina flour for dusting
- extra virgin olive oil for drizzling
- 1 batch homemade pizza sauce (see recipe linked)
- 8 ounces fresh mozzarella cheese, not packed in water blotted dry and torn into pieces
- fresh basil leaves plus more for finishing
- parmigiano-reggiano cheese optional
Instructions
Prepare the Sourdough Pizza Dough:
- Important Note: Please note that this sourdough pizza dough recipe requires a large quantity (250 g) of ripe sourdough starter. Scale up the previous night's feeding so the starter is ready in the morning. See the example baking timeline in the note section below.
- In a large mixing bowl, combine the water and salt. Use your fingers to swirl the mixture together until the salt has completely dissolved. Add the ripe sourdough starter.
- Using your fingers, pinch the mixture together, distributing and breaking up the starter into small pieces throughout the water.
- Add the "00" and bread flour to the bowl. Using a Danish dough whisk or your hands, mix until the dough comes together and no dry clumps remain. The dough will be shaggy. Cover and rest at room temperature (72°F/22°C) for 20 minutes.
- Transfer the dough onto a lightly floured countertop. Knead the dough for one minute, dusting it lightly once or twice with flour if needed to prevent it from sticking. The dough should be tacky, but very smooth. Lightly coat the mixing bowl with olive oil, lightly shape the dough into a round, and transfer to the greased bowl. Cover and proof at room temperature (72°F/22°C) for about 3 hours. The dough shoud have risen at least 50% and be rounded on the edges.
- Transfer the dough onto a clean countertop. Using a bench knife, divide the dough into three equal-sized pieces (roughly 280 grams each).
- Shape the Dough Pieces into Rounds: Shape the pizza dough pieces into balls. Working with one piece of dough at a time, grab the top portion of dough, stretch upwards, then fold back into the center. Repeat from the opposite edge. Continue along the outer edges of the dough, folding them back into the center to form a tightly seamed package. Flip the dough seam-side down and use your hands to gently shape into a round, using the countertop to build tension into the surface. Repeat with the remaining dough pieces.
- Transfer the dough balls into a flour dusted proofing box (or rectangular pan with lid or large plate), setting them apart. Dust the tops with flour. Cover and proof at room temperature for a minimum of 5 to 6 hours or until ready to assemble or bake pizza that evening. The dough will hold for 3 to 4 additional hours after proofing. Make Ahead Instructions: Alternatively, shape and allow the dough balls to proof for 4 hours, then transfer to the refrigerator overnight. Remove from the fridge and allow the dough to rest at room temperature (72°F/22°C) for 2 to 3 hours before using.
- After the final proof, the dough balls should have expanded considerably, nearly doubling in size. Shape and bake using the instructions below as a guide.
How to Shape and Bake Sourdough Pizzas (Margherita Style):
- Set a baking steel on a rack in the upper third of the oven, roughly 6 to 7 inches below the broiler element. Preheat the oven and steel to 500°F (260°C) for at least one hour. Prepare the pizza sauce, toppings, and set out for easy assembly.
- Lightly dust a wooden pizza peel with flour and sprinkle with semolina flour. Use your hands to spread the mixture into a thin layer across the surface. Set aside. This will keep your dough from sticking and help with transferring.
- Just before assembling pizza, turn the oven broiler to high for 10 minutes. This will blast your steel with an extra dose of heat. Generously sprinkle your countertop with flour. Carefully lift one pizza dough round from the proofing container (covering the remaining dough) and set on the flour. Dust the top with flour.
- Using both hands, press the dough with your fingers, starting from the center and pressing outwards toward the edges, rotating the dough as you go while maintaining the edges.
- Once the dough is roughly 6 to 7 inches in diameter, lift the dough with both hands, allowing the center of the dough to rest on your knuckles. Gently stretch the dough by pushing your knuckles outwards, rotating the dough continuously, while maintaining the slightly rounded edges. Allow the dough to hang off your hands slightly, allowing gravity to help stretch the dough into a thin roughly 10-inch disc. Gently transfer the dough onto the dusted pizza peel.
- Drizzle the surface of the dough with extra virgin olive oil. Use your hands to brush it over the surface, concentrating on the edges. Spoon roughly ⅓ to ½ cup of homemade pizza sauce into the center of dough. Use the back of a spoon to spread the sauce into an even thin layer, leaving a ¾-inch border on all sides.
- Distribute torn mozzarella pieces (roughly ⅓ of the 8-ounce mozzarella ball) over the sauce and top with several torn basil leaves.
- Transfer the pizza onto the hot baking steel. Immediately turn off the broiler and set the oven to 500°F (260°C). Cook the pizza for 4 to 5 minutes, rotating it on the steel once or twice if needed, or until the bottom is crisp and lightly spotted. Finish the pizza under the broiler, watching carefully, or until the edges of the crust have gained color.
- Using the peel, remove from the oven and place on a wooden cutting board. Lightly drizzle with extra virgin olive oil, fresh basil leaves, and freshly grated parmigiano-reggiano cheese (if desired). Cut into quarters and serve immediately.
- Set the oven back to temperature and repeat with the remaining pizza dough, assembling and baking each pizza before serving.
Tips for Success:
- For added chewiness and crispiness (particularly if baking in a home oven), I’ve had more success with sourdough pizza dough made with almost equal amounts of traditional Type “00” flour and high-protein bread flour. This recipe has been tested extensively with Central Milling “00” Flour, but has also been prepared with Caputo (Italian brand). They do differ in protein levels, but both create great pizzas. For bread flour, I recommend King Arthur for similar results.
- This pizza dough can be prepped a day ahead. Follow the pizza dough instructions above, but only allow the dough balls to proof at room temperature for 3 to 4 hours. Transfer the container to the fridge and refrigerate overnight. Allow the dough to rest at room temperature (72°F/22°C) for at least 2 to 3 hours before using the following day.
Example Baking Timeline:
- Note: This sourdough pizza dough recipe requires a large quantity (250 g) of ripe sourdough starter. Scale up the previous night’s feeding, so a portion is ready to be used in the pizza dough.
- 9:00 AM – mix the pizza dough, cover and rest for 20 minutes.
- 9:20 AM – knead the dough briefly, cover and rest for 3 hours.
- 12:20 PM – shape the dough into pizza balls, place in a floured container, cover, and proof for at least 5 hours or until you’re ready to make pizza (they will hold for up to 4 additional hours if needed)
- 6:00 PM – preheat the oven and baking steel
- 7:00 PM – prepare your toppings
- 7:15 PM – assemble and bake pizza



67 Comments on “Sourdough Pizza Dough”
I’ve tried other sourdough pizza recipes, but they all called for all purpose flour and a little whole wheat flour and the results were abysmal. I made this crust for a few friends we had over last night-risky because it was the first time I had made it. But it was SO WORTH THE RISK!!!! I don’t think I’ll ever have to order take out pizza again! My friends have been texting me today about how amazing it was. And they were right! It was absolutely delicious! The most difficult thing was getting it from the peel to the stone. But I figured it out. Only real downside is having to make the dough in the morning. But I will get over that too!!
Thank you for taking a chance on the recipe, I’m so glad to hear you enjoyed it and appreciate you taking the time to leave a review!
SOOOOO GOOD! I consider myself a connoisseur of pizza and this is the best recipe I’ve found! Thank you SO much for sharing this recipe! LOVE it!!
Next step: see how well it freezes!
Great recipe with clear instructions. I have struggled with pizza bases but this is now solved 👍👍👏👏
Yes, finally I found a sourdough crust I love, thank you so much!!! I’ve tested several recipes and yours is the hands down winner :). Yes, fresh is definitely the best but I do sometimes pre-cook a few crusts for just long enough to hold their shape and then freeze them so my husband can take out a crust when I’m out of town and put together a pizza real quick. It makes him happily think he’s a good cook.
Perfection. Came out just how I had hoped. The first recipe I tried was insanely wet and despite a long proofing time, was dense upon cooking. This recipe helped me develop delicious, airy crust. I can’t wait to try it again and perfect my timing. Thanks so much.
Hi! I just attempted to make this dough, I followed all the instructions and used a really mature sour dough starter that is active. After the first 3 hours of proofing, I’m still left with very sticky, flat dough that is impossible to work with. Any suggestions?
Tried other recipes and failed, but this one was bang on ! Perfect sourdough pizza, done on the Ooni, best pizza I ever made !
Can I make dough and freeze then thaw when I’m ready to use?
Hi Angel! Unfortunately I haven’t tested that to know for sure, but it’s definitely worth trying. I need to do this and try it out before I provide freezing tips – personally, I’m not usually a big proponent of freezing/defrosting pizza dough (I find that they get sort of gummy).
I have read where you can par bake a pizza crust and then put it in the freezer. When you take it out of the freezer put your cheese and toppings on and bake. I would think the temp would be good about 400-425 kind of like store bought frozen pizza.
Most pizza dough recipes I have read are at a hydration in the low 60%s. Yours if I am correct, is at 70%. Would a lower hydration make the dough easier to handle? Also if using a stand mixer, how long would you suggest kneading the dough with a dough hook after initial mix and rest?
Hi David, yes, you’re correct in thinking my hydration is higher than some recipes. Although it’s hard to compare recipes strictly based on this, because a lot of pizza dough recipes will use different flour blends or types. Different flours have different hydration capacities, so it doesn’t necessarily mean one is easier or harder to handle. Personally, I find higher hydration doughs easier to handle. Generally, high hydration doughs will offer greater extensibility, which for pizza is a good thing because it means you can stretch it out thinner. This pizza dough definitely works in a home oven on a steel, but really shines in an outdoor pizza oven like an Ooni (or comparable) where the temps get really hot.
You’re welcome to reduce the water a bit if you think that would be easier for you! As for the stand mixer, this dough really does NOT need a stand mixer for any sort of kneading. It is so low maintenance and I would save the extra dish washing. I knead it for almost no time at all and it isn’t labor intensive. At most, maybe 1-2 minutes!
Hi David, when I calculated the percentages flour is 58% and water is 42%. How did you get 70% hydration? I’m confused and want to try this recipe 😅
Hi Lexi. To calculate true hydration, you need to account for the flour and water from the starter (100% hydration starter). Hope this clears things up!
Ah yes, I worked it out, it’s 70% 😅
This one worked for me after several fails! Really tasty. Divided the dough in half because we have a large Ooni, then refrigerated for at least one night.
Tried this and it and it’s a great recipe. Have to say I cut the salt by 50% though. 5 grams of salt per 10” pizza is just crazy and frankly unhealthy, unless you do intense exercise or long sauna sessions on a regular basis.
Hi David – 2% salt by weight is a standard ratio for any bread dough (and honestly MANY food preparations), it might sound crazy but it is not. Also, this recipe yields 3 pizzas. 😉 Obviously you’re welcome to adjust the recipe however you want, but it will impact the flavor more than you might realize, it also impacts fermentation greatly. Glad you enjoyed the dough!
I can not get my crust to have the airy dough look. It doesn’t rise. It’s my third time trying. My starter is very ripe. Last time I thought I over fermented, this time I did everything with checking temps and hydration. It still tastes great but flat and almost undone. I use a pizza stone in my oven.
Are you preheating your stone for at least an hour at a very high temp? It’s hard for me to say because I’ve never experienced that with this dough – but I have a baking steel (which conducts heat much better than a stone) and an outdoor pizza oven. Are you making any other changes? There really is no reason why this would ever happen – especially with this much starter – unless there’s some other factor (under/over fermentation, equipment issues, etc) at play. Happy to help troubleshoot, it can just be a little difficult without more details!
One last thing – handling is important here. Depending on how you stretch your dough when you’re shaping the pizza, you could be deflating the gases and that could be resulting in a different crust texture. Are there any other texture problems???
Which sour dough do you like? I’m going to try mine but you mentioned certain flours for your starter?
Hi Megan, I think this is what you mean, but correct me if I’m wrong: I do not adjust my normal feedings or create a separate starter just for pizza doughs, so my starter is regularly fed with primary bread flour and a tiny tiny quantity of rye flour. Hope this helps!
I don’t have a baking steel but I do have a pizza stone. Will that work? I’m really looking forward to pizza tonight. I like that this recipe used a lot of starter.
Yes, it will absolutely work. Assuming you’ve done this before and your stone is strong enough to withstand some heat (they can be more prone to cracking), I would recommend finishing the pizza briefly under the broiler to give it more color (that’s the bigger difference between the steel esp on the bottom crust). Also, definitely do a full 45-1 hour preheat for the stone!
Thank you!
The verdict is in and this pizza tonight was a thousand percent better than my first attempt with another recipe. And what a fun couple’s evening. We now know what a peel is and NEED one – try building the pizza on a floured cutting board and then sliding it off onto a hot stone! My only issue and this is something I’m struggling with when making bread – the rise. For the pizza, the first rise was fine – it looked like the pictures. But I don’t think the second rise got close to doubling. The end result was a crust that was a little chewier than maybe would be preferable. And the starter this morning was def at its peak – very frothy and bubbly. Same with the bread I’ve made. I think for it, I need to build more strength into it with more folds. But I’ve wondered – is my starter of good quality. It seems to be, but maybe a better flour? Anyway – sorry for unpacking so much. I gobbled up an entire pizza and just a little more! Thanks, Laura – nice site. I’ll def be bookmarking!
I don’t have 00 flour. I’m going to find out if I can make it with just bread flour. Looks delicious though.
Such a perfect pizza dough!
Would this recipe work to par bake the crusts and freeze for later?
I have done this, but I did it with sauce added. I haven’t tried it with literally nothing on it – it works very well but of course is still better cooked fresh!
So delicious. The crust was amazing and I loved how i could start it in the morning and have it ready for dinner and it was simple to do. Not very hands on but still produced a great result. My family declared it the best pizza ever. Thanks for all your tips and tricks
I have never made any kind of dough before. And I was thinking about trying this, but I don’t see the how to make the starter for this recipe.
Why is it not included here?
It takes several weeks to make a sourdough starter, and there’s a lot to cover – it isn’t like any other type of “ingredient” that you acquire easily. I recommend checking out my sourdough page and resources post which links to articles that show how to make one – but it is a commitment!
Came out so much better than other pizza doughs I’ve tried! Making it again today. Thank you!
I doubled the recipe, made 6 pizza for the whole family. We did an “atelier pizza” where the grand children got creative with toppings. It was great. The recipe is outstanding, the taste superb, the crust airy and delicious
Thank you for this wonderful recipe
Can this dough be frozen and at which stage of manufacture is best to do so.
Hi Joseph, sorry for not replying right away. I really think pizza dough – particularly sourdough pizza – is best when used fresh or after a brief refrigeration. Freezing tends to change the texture (and can make it really sticky in my experience). I haven’t tested that with this particular recipe, so I can’t tell you exactly how it works with this one, but I don’t recommend it for best results.
I have been looking for the perfect pizza dough and alas, I have found it! I’ve made this 5 times now and it’s amazing. I bake the pizzas in my cast iron and it is the best pizza I have ever made and my family and friends agree. Thank you so much for sharing this recipe with us! ❤️
I want to try using my iron skillet, did you preheat the skillet ? Same temp? Time?
Thanks Tammy
I haven’t tested this particular dough using a cast iron, but I would imagine it would do well. I would recommend preheating at the highest temp your oven goes to (500°F) for roughly 20 minutes? Unfortunately I can’t give specifics because this recipe and dough hydration wasn’t tested with this particular method.
I am SO excited to try this recipe out. I make a similar sourdough pizza with AP flour and it’s delicious but I’m wanting to experiment with 00 and therefore have a few questions! I’m used to doing “stretch and folds” for 30min increments for a few rounds before the first rise, any need to do that with 00? I also do a long ferment after the initial 6 hr rise (and after shaping dough) of three days in the fridge. Is that possible with 00 or will it react completely different than all purpose (I normal use 125g of starter for a 4 pizza yield but because your recipe calls for double the starter will it sour extra fast)? And lastly is it possible to up this recipe a tad without completely doubling everything? Question overload complete. Thank you for any assistance you are able to provide!
Hi! I think you’ll love the 00 flour – it really does have a dramatic impact in the final pizza crust/texture over something like all-purpose, which is generally much lower in protein, which is probably why you need to do more gluten development with the stretch and folds. The recipe instructions go into further detail, but this technique does not require stretch and folds like a sourdough bread. It is simply kneaded for a short period and left alone. Obviously you want to develop strength and some tension in the dough, but it is very unlike bread in that way. This produces a very extensible dough that can be stretched thin, but is very strong. You can also prepare it with 100% 00 flour too.
You can absolutely refrigerate this dough overnight – I include those specific instructions in the recipe notes – but it tastes fantastic made start-to-finish in one day, and while it does taste great the next day, I’m not sure if I truly notice a dramatic enough improvement to warrant it, especially since I often like to make pizza on a bit more of a whim. I like that I can decide as soon as the night before, scale up my starter, and have excellent pizza the next night for dinner.
This dough does use a lot of starter, mostly because it’s a one-day process and that will absolutely contribute to its flavor over less sourdough starter. In terms of increasing the quantities to scale it up, you absolutely can! The way to do this would be to use the baking percentages for the dough (I actually had meant to include those in the post and will add those back in!) and simply scale up slightly using a calculator to calculate the new quantities for everything. Hope this helps!
This was INCREDIBLY helpful. Thank you so much for responding.
This pizza dough is insanely good. I am newer to sourdough… Just started my starter a couple months ago, and have been trying to find a good pizza dough recipe. This was perfect, easy, and will be our pizza dough from now on! If you are like I was just yesterday and you’re currently surfing through Internet recipes for sourdough pizza crust… Stop searching. Use this one.
Thank you so much!
Got it second time around. Excellent!
Love that you can start early and eat same day. I’m having pizza for bfast today as timing called for. Started late but was committed.
Best sourdough crust recipe I’ve tried. Thanks for sharing.
Thrilled to hear this! Thanks Michael!
Can this sourdough recipe be frozen?
I haven’t tried freezing this dough, I generally think it’s always better to make it fresh! Or adjust the timing a bit to refrigerate it for 1-2 days before use. I’d need to test this out before I could give you better feedback or advice on this!
I made this pizza dough today and it was excellent, probably the best dough I’ve made.
So thrilled to hear that!! Thank you for taking the time to leave a review! I really appreciate it.
Amazing pizza dough recipe! I only used 60 grams sourdough starter (didn’t have enough) and it still worked!!
I’ve started preparing the dough too late and my family wants pizza tonight so I’m wondering how much will the texture change if I don’t prove it that second time for 5 hours? In other words I would just do the 3 hour proof then make the pizza.
I think it should be ok – you can also try putting it in a warmer spot to speed it up. Worse case scenario is that it will be slightly crisper and the edges of the crust won’t rise as much or be quite as airy.
You don’t mention the hydration of your starter. Is it 100?
Yes! Sorry, I’ll add that. I have that information in all of my other sourdough recipes and should have included that here too. I would always specify if it wasn’t 100%!
Really great detailed recipe. Love that I can make dough in the morning and enjoy pizza for dinner as other doughs I’ve tried often require long refrigerated ferments. Really nice sourdough flavor. Thanks!
“Game changer recipe!”….what an understatement that was. I’ve consistently maintained my sourdough starter for the past 4 years, and this flavor filled pizza crust is absolutely at the top of my list, for use of my ferment. But it’s not just the quality upgrade of my pizza that has me singing praise and thanks for what you’ve shared….in my life, I have never enjoyed such ease of hand stretching a pizza dough. Sincere thanks for upping my pizza game.
Mahalo Laura for the recipe! Tried different pizza recipes and I love this one. I love how tender it is but when I tried shaping it I guess I spread it out a little too thin causing a hole plus our wood fire pizza oven might have been too hot causing the back to burn one side. The flavor is great and my little one loves it.
Going to attempt again tonight but being careful with shaping the dough and with a lower temp on the pizza oven.
Hi Lizzie! So thrilled to hear that you enjoyed it and the flavor! Definitely be careful shaping – it should be relatively strong, so fairly resistant to tearing, but it can happen if you push it too thin. I have a quick video on my Instagram (https://www.instagram.com/stories/highlights/17921234956666056/) that shows how I do this if its helpful.
Also, good to know about the pizza oven! I don’t currently have a pizza oven (that will change in the next month), so I couldn’t test this recipe in one, but maybe keep the inner crust slightly thicker, since the oven temps are hotter, and be sure to rotate it continuously. You could also try increasing the hydration by 10-20 grams and that might help too. Thank you for taking the time to leave a review!!!
I am so excited to try this. I haven’t had much luck making a really good sourdough pizza yet. Can this dough be frozen if you don’t need 3 pizzas?
I don’t have a ton of luck with freezing pizza dough, personally. I think you’d be better off halving the recipe – which is easy because the quantities are in grams – or parbaking any extra pizzas (and freezing them for a later dinner!) which I have done and works very well.
Beautiful photos and thorough instructions! Will be easy to understand for anyone, and a nice brush up for those of us who have been laying dormant for a bit. Will give it a go this weekend!!!!! 😉
Thanks so much Danielle! Can’t wait to hear what you think.
I am SO excited for this recipe…I’ve been waiting (semi-patiently) since you hinted it was coming on Instagram. Definitely foreseeing many more sourdough pizza nights around here!
Yay! Thanks so much Joanne, and thanks for your patience! Please report back once you try it! It means a lot. 🙂