Sourdough Bread Troubleshooting Guide and FAQ
Basics + FAQ Equipment and Tools Troubleshooting
Here you’ll find answers to the following questions and much more:
- How much sourdough starter should I use in my dough?
- I can’t find bread flour. Can I substitute all purpose flour?
- What is your favorite baking vessel?
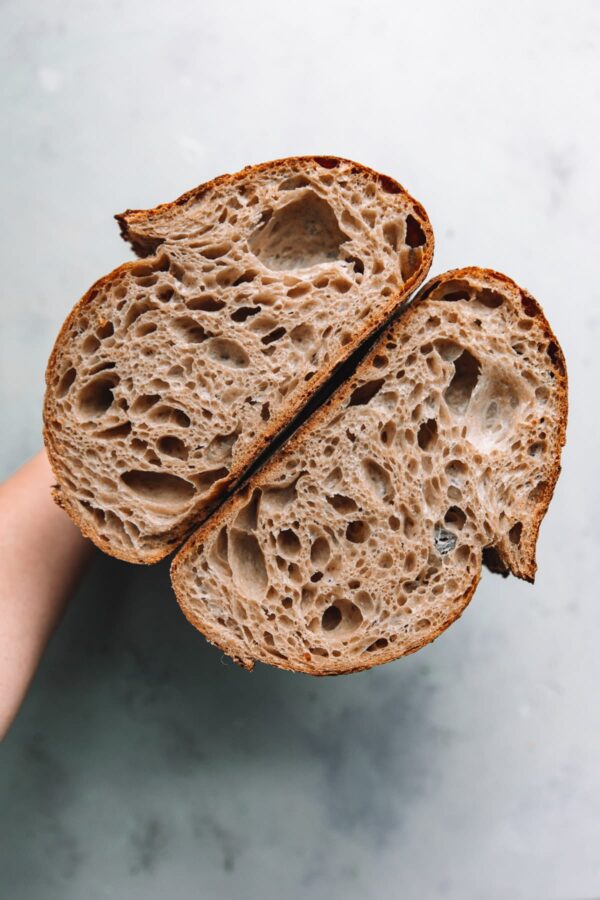
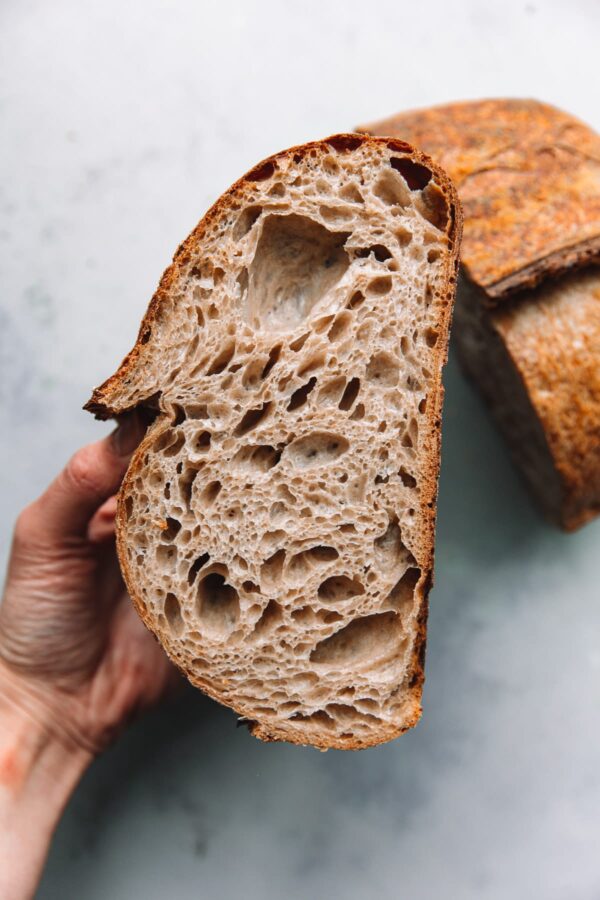
- Why are my loaves coming out dense or gummy? How can I achieve an open crumb?
- How can I prevent the bottom of my loaves from browning too quickly?
Note: If you have additional questions, please leave them in the comment section.
Skip to Various Sections:
Basics + FAQ Equipment and Tools Troubleshooting
Sourdough Bread Baking FAQ:
Q: How much sourdough starter should I use in my dough?
Every recipe will vary, depending on the technique and timeline, but a common baker’s percentage for sourdough starter is 10%-20% of total flour weight.
This will vary depending on other factors, but higher amounts of sourdough starter will generally speed up bulk fermentation and lower amounts of sourdough starter will slow down bulk fermentation.
You can read more about baker’s percentages in my sourdough starter troubleshooting guide.
Q: I can’t find bread flour. Can I substitute unbleached all purpose flour in your recipe?
Yes, but you’ll need to make changes and adaptations to account for their differences. I highly recommend reading my guide on bread flour vs all purpose flour for detailed information and substitution guidelines.
In summary, unbleached all purpose flour is lower in protein than bread flour. Example: King Arthur All Purpose Flour is 11.7% protein. King Arthur Bread Flour is 12.7%. Some brands of all purpose flour are significantly lower in protein (ranging between 9%-11%). All of these factors are important and impact crumb texture, etc.
Due to the lower protein levels, all purpose flour does not absorb as much liquid as high protein bread flour and can’t produce as much gluten strength. If you’re substituting all purpose flour in my sourdough bread recipe, I recommend reducing the hydration to roughly 300 grams to be safe.
Q: I can’t find any flour. Do you have any good resources?
As grocery stores and supermarkets have struggled to keep up with demand and supply, many people are struggling to find flour at supermarkets. This isn’t due to flour shortage issues, but supply chain problems with major brand names.
If you’re struggling to find flour, I highly recommend finding a local mill in your area (many are shipping!) or reaching out to your local bakery to see if you can buy some from them. You can also order larger quantities (5o lb bags) and create a bulk buying system with friends or neighbors in your area.
Here is a great resource of local flour mills in every state: https://challengerbreadware.com/where-to-buy-grains-flours/ Note: Freshly milled flours can vary in protein levels, extraction rates, and often ferment more quickly.
Q: Why do some recipes call for different mixing and folding methods (stretch and fold, coil folds, lamination, etc.)?
The good news? There are a million ways to make sourdough bread and everyone has their own preference. The bad news? This can create a lot of confusion, especially if you’re just starting out.
I recommend learning as much as you can about the various techniques, trying your hand at each method, and figuring out what works best for you and the type of the bread that you want to make.
If you’re looking to delve into these methods in detail, I recommend Trevor Wilson’s Open Crumb Mastery e-book (not for beginners).
Q: How can you build more tension and strength into dough?
The trick to sourdough bread is creating just enough tension in your dough. Not so much that you are degassing or hindering it’s development, but not so little that your dough collapses and can’t trap pressure air/gases created during fermentation.
If you’re struggling with slack or undeveloped dough, I highly recommend reducing the hydration (water quantity) until you’re confident. Slowly your way up to higher hydration levels as you continue to bake.
Q: How do you know when bulk fermentation is done?
Bulk fermentation is the time period between when you add your starter (levain) to your dough and when you turn it out for shaping. Bulk fermentation time will vary depending on your ambient holding temperature, dough temperature, starter strength and quantity, and other variables.
In my opinion, judging bulk fermentation time is one of the most difficult parts of baking sourdough bread. Dough will develop differently depending on flour type (is your loaf whole grain? or made with white flour), sourdough starter strength, and how the dough is handled and developed.
For my sourdough bread recipe and olive sourdough, I push bulk fermentation far as it has a very short rest (often it doesn’t rest at all) before being transferred into a very cold fridge. I generally look for 50% increase in volume, signs of good fermentation on the surface (bubbles of varying sizes), and a dough that looks alive and aerated (if you gently shake the bowl, the dough will jiggle).
Read more below on under-proofed vs. over-proofed dough.
Q: Do I have to retard my dough in the refrigerator prior to baking?
No. You can allow your dough to finish proofing at room temperature prior to baking. I prefer to retard my dough overnight in the fridge prior to baking for several reasons:
- This final cold retardation of the dough helps develop more complex flavors in your final loaf.
- Baking cold generally produces significantly better oven spring and crust development.
- Cold dough is much easier to handle, transfer, and score.
Bread Baking Equipment Questions:
Q: What are your favorite sourdough tools and resources?
You can find all of my favorite sourdough tools in my online shop. If you’re looking for more specifics and detailed information, reference my favorite sourdough bread tools article.
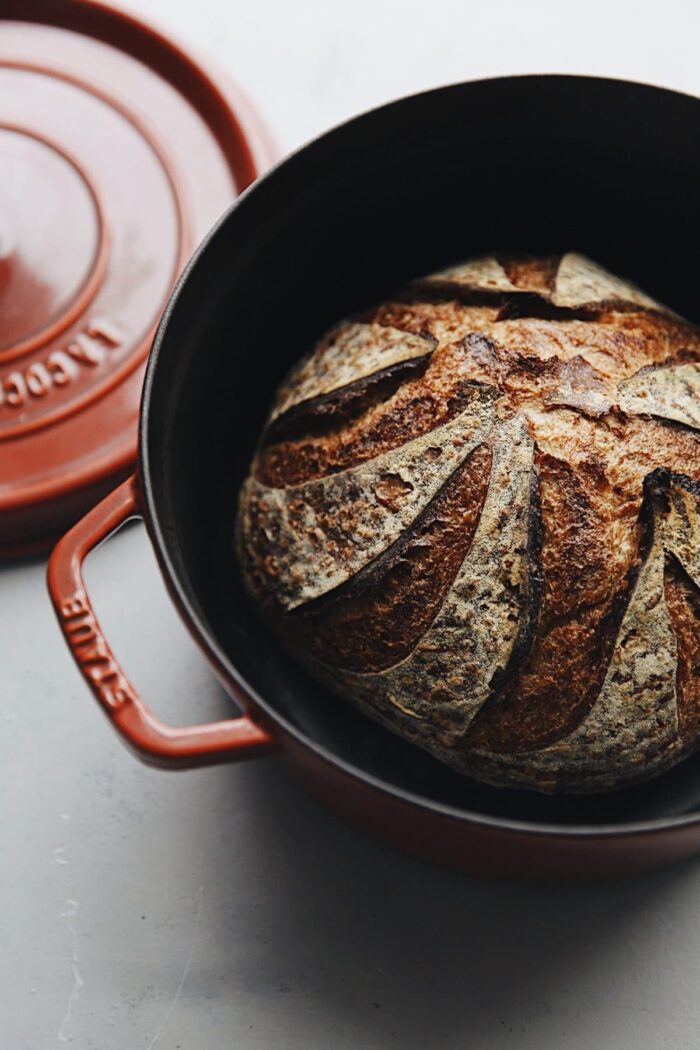
Q: What baking vessel do you use to bake your bread?
When I first started baking, I used a standard 5.5 Quart Dutch Oven for all of my bread baking.
As of January 2020, I do all of my bread baking in my Challenger Bread Pan (generously gifted to me). The unique shape and design allows you to make batards (ovals – my preferred loaf shape), demi-baguettes, and boules (rounds).
It is an incredible baking vessel due to it’s design and ease-of-use. Loaves baked in my Challenger Pan have better oven spring, color development, and crust texture.
It makes transferring of dough significantly safer, easier, and avoids the waste of parchment paper. If you’re serious about bread baking, it is a great investment. The bottom griddle can also be used for focaccia and other baked goods, or used similarly to a cast-iron skillet.
Q: Can I still make sourdough if I don’t own a Dutch oven, combo cooker, or Challenger Pan?
Yes, but steam is very important for sourdough bread baking and you’ll most likely have to resource to various tools (lava rocks, roasting pans with hot water, etc.) as alternatives.
Dutch ovens, combo cookers, and the Challenger Bread Pan allow you to cover and easily trap steam in the first stage of baking (mimicking a bakery deck oven). This helps prevent your dough crust from setting too quickly, which can hinder proper oven spring and crust development.
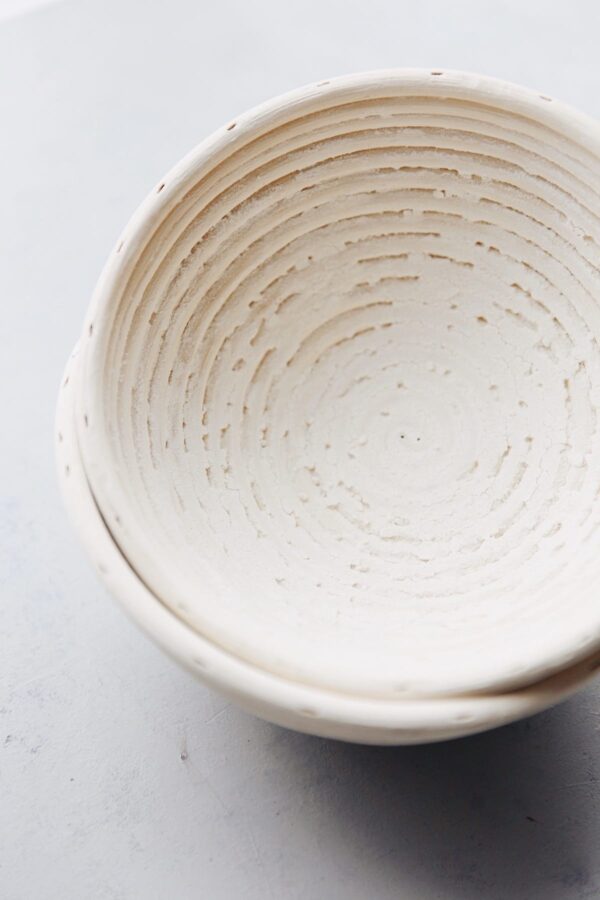
Q: I don’t own a banneton. What should I use instead?
You don’t need a banneton to make sourdough bread, but they are very useful tools (it helps draw moisture from the dough during resting, which leads to better crust development) and pretty affordable if you’re looking to delve into sourdough bread baking. They’re available in a wide variety of shapes and sizes, but round and oval are most common.
If you don’t own a banneton, you can use a bowl (be sure to use one that is similar in shape and dimension to the recommended banneton size!) lined with a well-dusted kitchen linen.
Q: What can I use to score my dough if I don’t own a bread lame?
A bread lame is simply a tool that holds a curved or straight sharp razor blade. It allows you to quickly and easily score bread (which allows your bread to expand properly and steam to be released during baking).
If you don’t own a bread lame, the next best alternative is any sharp razor blade. The sharper the blade and cleaner the scores, the better results you’ll see. Cold retarded dough is much easier to score than room temperature dough.
You can also use a sharp knife or kitchen scissors, but they’re not ideal and will not produce similar results. If you’re looking to play with more intricate scores or achieve beautiful ears, I recommend investing in a good-quality bread lame. It makes all the difference!
Troubleshooting Questions:
Q: I don’t own a baking scale. Can you provide volume measurements for your recipe?
Unfortunately, no. Volume measurements are wildly inaccurate, but especially problematic for sourdough bread or sourdough pizza baking. There is no way to accurately measure starter using cups. First and foremost, I want people to have success with my recipes. There are so many variables involved in sourdough baking – let’s not make it more difficult!
Metric weights are standard in bread baking and will yield the best and most consistent results. They also allow you to easily scale up or scale down any recipe (or adjust baker’s percentages). Basic kitchen scales cost less than $10 and are a must-have tool!
Q: My dough is taking forever to gain volume and is still very dense and lifeless at the end of the recommended bulk fermentation time.
It sounds like your dough and/or your ambient temperature is very cold or you’re working with a weak, under-active sourdough starter.
Yeast and bacteria prefer warmer temperatures. Try placing your dough in warmer area of your kitchen (75F-80F is ideal) – monitoring your final dough temperature to keep it as consistent as possible – or consider investing in a bread proofing box.
Q: My dough is too slack and is not developing good strength. Help!
If your dough is not developing enough strength, this can be the result of poor mixing or dough development through bulk fermentation. Add an extra set or two of stretch and folds and see if that helps, or reduce the hydration on your next loaf.
If you are working with new flours or flour brands, I prefer to hold back some water during the autolyse and see how the dough is developing (can I use my fingers to stretch it very thinly with no tearing?).
If I feel confident that the dough can handle more water, I’ll add a portion of it back when I incorporate my starter.
Q: My dough was a sloppy mess after bulk fermentation and couldn’t be shaped. Help!
It is extremely hard to diagnose sourdough bread troubleshooting issues without knowing more details as to your specific situation. What recipe are you following? What flour are you using? How old is your sourdough starter? What is your ambient kitchen temperature, etc.?
Higher hydration sourdough recipes, by nature, can be challenging to work with if you’re unfamiliar with them. For more tips on pre-shaping and shaping, be sure to watch my step-by-step Youtube video.
If your dough develops nicely during bulk fermentation and turns into a sloppy, disintegrating mess during shaping, this is a sign of over-proofed dough (is your kitchen very hot? did you extend bulk fermentation too far? are you using freshly milled flour?) or potentially collapsed dough structure due to poor development.
Substantially over-proofed dough is impossible to shape. Your best option is to turn it into a well-oiled sheet pan and bake it immediately. Try again and watch your bulk fermentation carefully. Let the dough call the shots!
Q: My loaves are dense and gummy or have huge air pockets surrounded by a tight crumb. Why is this happening?
Extremely dense, gummy loaves or loaves with a few massive air pockets surrounded by a tight dense crumb are the result of under-proofed dough. This is extremely common problem among beginners.
This is often the result of a weak or under-active sourdough starter (be sure to read my sourdough starter troubleshooting guide for more details) or undeveloped dough. Try building up your starter strength for another week or extending bulk fermentation on your next loaf or finding a warmer spot in your kitchen!
Be mindful that cold ambient temperatures can create problems as well. Try placing your dough in warmer area of your kitchen (75F-80F is ideal) or consider investing in a bread proofing box.
Q: How do I achieve an even, open crumb structure?
Please remember that there are many different types of bread and crumb preferences are subjective! Different techniques will result in different results. Figure out what type of bread you want to make.
However, if you’re looking to achieve open, lacy crumbs, I highly recommend Trevor Wilson’s Open Crumb Mastery e-book (not for beginners).
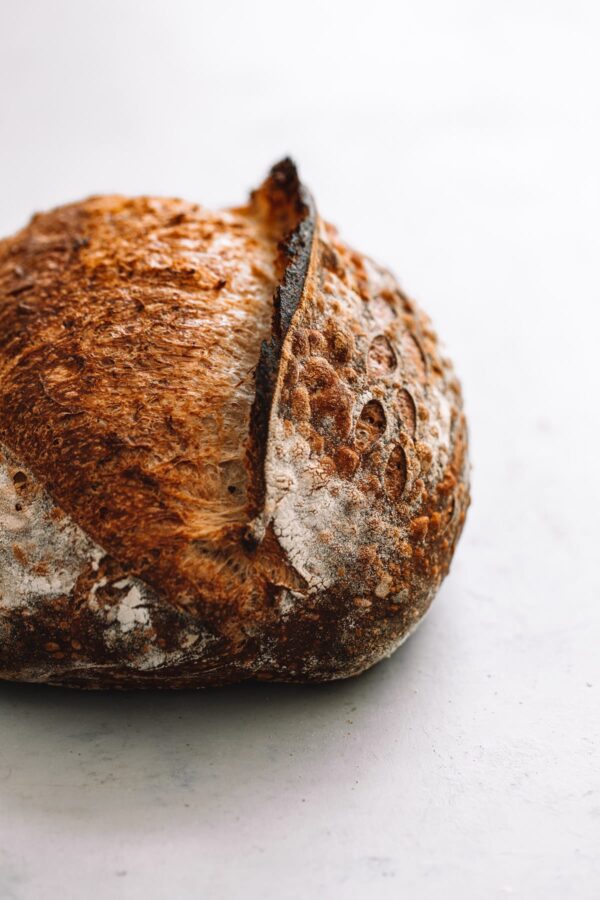
Q: Why aren’t my ears or scores opening nicely?
Prominent bread ears and well-developed scoring are due to a combination for factors: proper fermentation and dough development and proper tension, shaping and scoring skill/technique, and oven temperature/steam. Owning a good-quality and sharp bread lame is also important.
Regardless of how you score your dough, under proofed dough will yield dull scores and pale crusts. Over proofed dough will have better color, but won’t have any strength to support scoring.
In addition, if you don’t score quite deep enough or at the right angle, ears will not develop as nicely. As you can see, there are a lot of variables at play. Keep practicing and keep at it. The more you bake, the better baker you will become!
Q: The bottom of my loaves are darkening too quickly. Is there a way to prevent this during baking?
First and foremost, I recommend a separate oven thermometer to ensure that your oven is well calibrated (ovens can be off by as much as 25+ degrees) and adjusting temperatures as necessary.
If this continues to be an issue, try placing a baking sheet (or two stacked baking sheets) under your baking vessel to add some extra insulation. Do not preheat the baking sheets! If the bottom of the loaf darkens rapidly and the crust is pale, this can also be an indication of poor fermentation.
Q: My Dutch Oven can’t be preheated to 500°F. Can I reduce the baking temperatures?
Some brands of Dutch ovens are not supposed to be preheated to high temperatures due to the material of their knobs (or other factors). In addition, some home ovens (particularly European models) don’t offer high temperature ranges.
Try experimenting and preheating at a lower temperature (450°F) or invest in a stainless steel replacement knob for your Dutch oven if the brand offers that option. Most high-quality Dutch ovens are safe at these temperatures, but please check the brand manufacturer’s instructions before proceeding with any temperature recommendations.
If you enjoyed this post, be sure to check out my other sourdough bread baking resources:
- How to Revive Dry Sourdough Starter
- Sourdough Starter Troubleshooting Guide
- How to Bake Sourdough in a Dutch Oven (and Shape a Boule)
- Artisan Sourdough Bread Recipe + Step-By-Step YouTube Video
- Kalamata and Castelvetrano Sourdough Recipe
- Sourdough Pizza Dough
- Favorite Sourdough Bread Tools and Resources
- How to Store, Freeze, and Refresh Bread

31 Comments on “Sourdough Bread Troubleshooting Guide and FAQ”
Thank you, this was super helpful! The dough I made today seems soggy. and not able to hold a shape, after 4 hours of bulk fermentation. So, I think the kitchen was just too cold! While the dough is chilling in the fridge to wait till tomorrow, I’ll be busy watching the Youtube videos!
Hi- my daughter has been making GF sourdough bread and it’s delicious. Her first loaves were amazing but now she is having an issue with a dense, almost under cooked looking, in the lower portion of the bread. Not the crust but right below it. We tried lowering the psyllium husk, using a new starter, lowering the temperature….got a little better but still there. Any ideas based on your experience?
I bake my bread on parchment paper in an oval Dutch oven. Bread is delicious, but the parchment won’t come off the bottom of my loaf! Would sprinkling with flax or corn flour help?
My issue is after bulk fermentation I have good structure but when I remove it from the banaton it is sticky and can not hold its shape.
Hi Angie, it’s really hard to tell what’s happening because there are so many variables in bread baking, but my guess is that you might be pushing bulk too far and it’s over proofed by the time you go to bake it. What is the resulting crumb structure like? It should not be sticky after being in the fridge.
Help! My loaf looks great after bulk fermentation and theres lots of bubbles, grew in size, wiggly, etc. I put it in the fridge overnight and it doesnt rise. Theres some air bubbles in the final result but its still slightly gummy.
Any thoughts? Have I let too much air escape during shaping?
I have been successfully baking bread for a while, but every now and then the top of my loaf opens up after it has been shaped…it looks perfect as I set it out and then right before I bake it it has opened up on top. Any thoughts.
Thanks so much!
Hi Rachel, do you mean it explodes? Are you scoring the loaf before baking?
My bread is so wide that I can’t get it out without cracking the crust. What do I do?
Once it’s baked? I’m a bit confused by your question. It sounds like either your pan is too small or your loaf might be over proofed or not strong enough – as this shouldn’t happen.
Hi! I have a question that isn’t addressed above. My loaves are coming out / rising just fine in the oven, but in the banneton totally losing its shape. Especially when I flip out of the banneton it just flops and I have to totally reshape. Is this an initial shaping problem? How can I fix it? Thank you!
If they’re still rising well, I wouldn’t worry about it too much – but it does sound like it might need more strength. Maybe try reducing the hydration slightly? Or adding another fold or two?
Hey! i have a question. I feed my sourdough starter every 24 hours, but when i feed it, i can see it’d risen, peaked, and fallen down, completely flat. That’s with every feeding for almost a week now, i see it’s peak is about 4/6 hs after i feed it. but after 24hs it’s flat again. Is it normal? is it ok? or should i keep waiting till its fully risen after 24hs?
Hi! It sounds like you have a strong active sourdough starter and if your kitchen is warm, it would definitely peak and fall within 24 hours (much less than this). Ideally, if you’re storing your starter at room temperatures, you would feed it at peak activity – which may require you, personally, to do 2-3 feedings a day. If that’s too much and you’d prefer 1-2 max, I would switch up your feeding ratios (see my sourdough starter guide) to slow it down a bit, use a bit colder water for mixing, etc. Otherwise, you might want to consider storing it in your refrigerator and reviving it with several feedings before baking. It just depends on how much baking you’d like to do and how much maintenance you want!
I’m not sure who advised you regarding the 24 hour mark, but you should always be observing your individual starter and feeding it when it runs out of food if you’d like to keep a very healthy starter (that produces very consistent loaves).
I use unbleached all purpose flour, did a 1 hour autolyse. Then do my bulk fermentation with 4 fold and stretch then about a 6 hour before shaping and then over night in the fridge bake in the morning preheated oven 475 with duch oven lid on whole time at 450
But my bread comes out a dark crust and brown crumb, crumb well don’t have one. I am getting so discouraged can you help at all. Tried to send photo but couldn’t figure out how to put it on
Hi Lynda. Have you tried my artisan sourdough recipe? https://www.abeautifulplate.com/artisan-sourdough-bread-recipe/ I really recommend trying that first, and using bread flour (especially if you’re new to sourdough), it will really help a lot.
I also recommend checking out my YouTube videos that walk you through the process of making that recipe, it might help a lot. Feel free to send me an email (laura@abeautifulplate.com) with pictures or more questions.
Hi! Thanks for this troubleshooting page! It’s really helpful. I just baked my third & fourth loaves ever! These came out really well, but the crust is way too thick. They are hard to cut and hard to chew. I baked them in a Dutch oven.
A good sourdough should have quite chewy crust, but not be hard per say – it sounds like there might be an issue happening if that’s the case. Have you tried my artisan sourdough recipe?
Hi Laura,
Thanks for responding. I haven’t tried your sourdough recipe yet. I found you after I googled “sourdough troubleshooting” when my first 2 loaves had really big holes. So far I’ve used recipes/information from The Perfect Loaf and from the New York Times (with my mom’s notes). I remember seeing an image somewhere (maybe on the perfect loaf website) that talked about oven times and temperatures that lead to different crust outcomes. I can’t seem to find it again, so figured I’d ask here.
Thanks for clarifying! That’s really helpful. I would try reducing the temp slightly if you find the crust too thick and hard (it really should be more crispy and chewy though – but definitely not so thick it’s basically inedible) – you can also try not letting it bake quite as dark, although I love the flavor of darker loaves.
If you’re interested, you might have some success with my recipe. I also have step-by-step videos on Youtube, which are embedded into the post! https://www.abeautifulplate.com/artisan-sourdough-bread-recipe/
I loved this recipe and I’m going to try it this week! One thing I do when working with my rising sourdough bread (instead of a bread proofing box) is use my Instant Pot on the low yogurt setting (“Less”) and it gets to a perfect consistent 79F degrees in my normally cold low-60s kitchen. Just FYI to others who have cooler ambient room temperatures and also have an Instant Pot. I use a bowl that fits perfectly in my 8-quart IP on a trivet and cover the IP with my glass lid, not the pressure lid. Good luck, everyone! Question for Laura: My 1:1:1 starter doubles in only 2-3 hours and I feel it’s time to take it to the next level just to not have to feed it so often, how do you suggest I do that?
That worked for me me as well. Thanks for posting your solution.. Really very happy to say, your article is very interesting to read.
Everything has gone very well. My starter, the recipe and had it in the fridge for 10 hrs. Took it out and let it rise..beautiful. Had is in a banin and when I turned it over onto parchment to put on the heated stone, it deflated…uugg… now I’m letting it rest correct side up so if it does come back I can just slip it onto the stone. Will it come back?? If it does will it not be as nice a loaf? I did flour the banin very very well..but just not easy coming out. Thank you for any guidance. Dianna Coumont
My third attempt my loaf looked perfect until I cut into it the bottom was bubbly and then a massive air gap to the crusty top . It tasted fine .
Thank you for all your bread info. I have been making your bread recipe exclusively for the last 4 months. My started doubles in size & passes the float test. I have been using my warming drawer for proofing and am able to keep the temp around 80. In order for me to get my dough to look somewhat like yours at the end for the proof it takes 8 to 9 hours. When it comes out, most of the time it has a good ear and variety of bubbles but it’s prob an inch shorter than yours. Any suggestions? I’ve been shortening the retard with mixed results. Thank you in advance for any suggestions.
If you planned to not do an overnight fridge hulk ferment how long would it need to ferment at room temperature before I could bake it? Thanks!!! Love this recipe.
It would depend on what recipe you’re following – as well as your ambient holding temperature, starter strength, etc. so there is no specific time that I can say. You have to watch the dough. However, a good indication that it is ready for baking is the poke test to check for proper proofing, which I cover in my sourdough recipe: https://www.abeautifulplate.com/artisan-sourdough-bread-recipe/
You’d want to bake the bread when it passes the poke test!
Thank you so much for posting your recipe and video. I have been making bread 2-3 times week exclusively using your recipe. I have two questions. If I wanted just a straight bread flour loaf would you recommend a lower water content. Ive heard whole wheat is thirsty. I love the 80 20 ratio but would like to give this a try. Second I’ve been using a 1:1:1 ratio for my starter and using this when it is ripe because when I use the 1:5:5 the bread is lighter but I like the flavor of the 1:1:1. Do you have any thoughts and am I crazy? Thank you for your time!!!
Part of your bread brigade!!!
So glad you’ve been enjoying it! You can absolutely use this recipe with 100% bread flour (just substitute the whole wheat 1:1). Whole wheat is thirsty, but it doesn’t produce as strong of gluten strands (due to the presence of bran and endosperm), so it’s not quite that simple when it comes to “strength”. I would personally use the same amount (if you’ve been doing the full hydration!), you could also play with increasing it depending on what bread flour you’re using.
As for the starter, the flavor of a starter shouldn’t change with a different feeding ratio unless you didn’t adjust your feeding schedule with the change. My personal recommendation/method is to always feed a starter at peak activity and not let it fall. A 1:1:1 ratio will peak faster than a 1:5:5 ratio (because there is less flour/food for the yeast present), so if you’re still feeding it/using it at it’s peak, there is no flavor difference between the two.
Did not see my question on the list so I am asking here. The sourdough bread recipe works well, nice open structure and ear. The problem I am having is I don’t get the blistered skin on the surface of the crust. I bake my bread in enamel cast iron pot. The recipe is a one day recipe meaning no refrigerated retard time. Would this have an effect on the blistering rather than a long refrigerated fermentation?
Hi Steven! Great question. Blistering mainly occurs with doughs that have a cold fermentation and are higher in hydration. Steam is also important during that first part of baking, but it really is the cold dough that helps. With the Challenger Pan (Dutch Ovens don’t lend themselves well to this), I’ve found that when I add an ice cube to the pan just before baking, I often get larger, more prominent blisters.
A fellow baker Kristen of Full Proof Baking just shared a post about this the other day that is worth checking out for even more information: https://www.instagram.com/p/CANib6eJSjd/