Rustic French Apple Tart
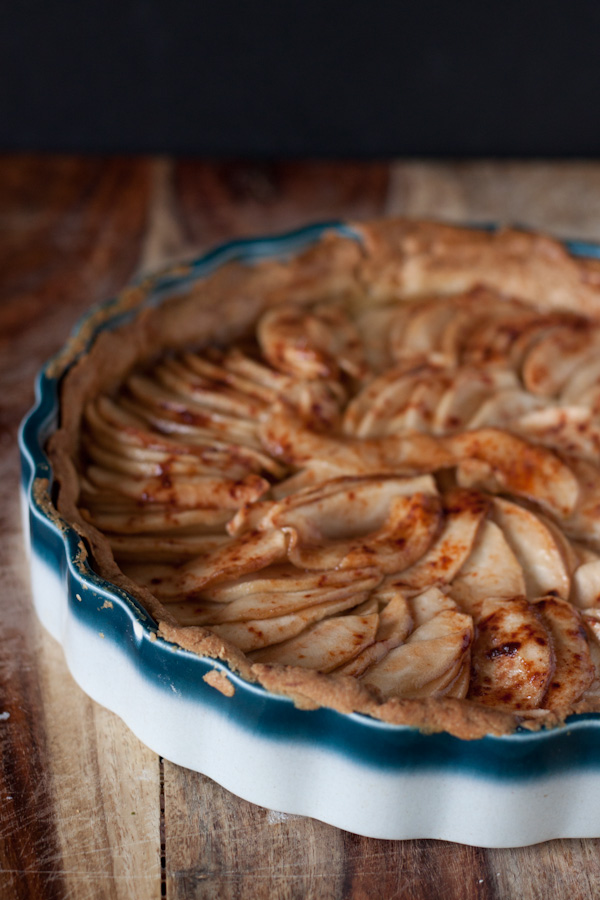
This Rustic French Apple Tart is simple to prepare, but delivers big flavor. Serve this classic tart warm with vanilla ice cream!
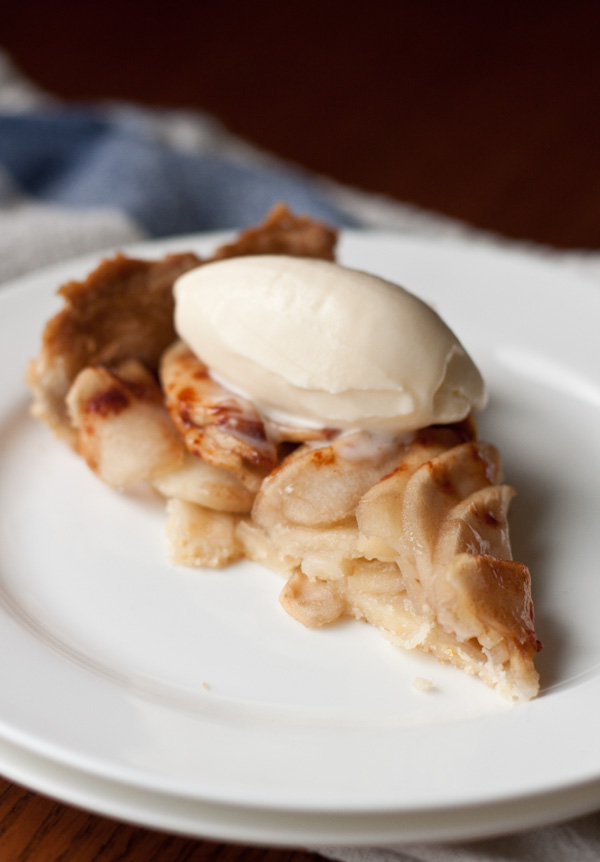
This French Apple Tart is my favorite type of desserts. Rustic, fruit-filled, not too sweet, and perfect with a scoop of ice cream.
Pastry is extremely scientific, precise, and for the most part, pretty unforgiving. Cooking, on the other hand, offers more of a “wing-it” approach. It can be hard to quantify and replicate and requires a lot of improvisation.
They are both challenging in different ways.
This Rustic French Apple Tart represent the best of both worlds. The crust requires precision and is fairly technique-driven, while the apple filling can be adapted in a variety of ways.
Need more apples, just add them. Have extra tart apples? Sprinkle on more sugar. Prefer different spices and fruits? Use them!
This rustic French apple tart is perfect for anyone hesitant to dive into homemade tart making. The classic pate sucree crust is simple to make, forgiving, and in this case, doesn’t require blind-baking.
In this case, the tart is baked for a long time on a preheated pizza stone. This allows the bottom crust to cook at the same speed as the sides, preventing a soggy bottom.
Rustic French Apple Tart
Ingredients
Pate Sucree Crust (Yields Dough for Two 9-inch Tart Shells):
- 8 ounces (230g) unsalted butter softened
- 4 ounces (115g) granulated sugar
- 1 teaspoon pure vanilla extract
- ½ teaspoon fresh lemon zest
- ¼ teaspoon kosher salt
- 1 large egg lightly beaten
- 12 ounces (340g) unbleached all-purpose flour
Filling:
- 1 lemon sliced in half
- 4-5 Pink Lady apples
- 2 tablespoons granulated sugar
- 1½ tablespoons cold unsalted butter cut into very small pieces
- 1 teaspoon ground cinnamon
Glaze:
- ⅓-½ cup apricot jelly or substitute another variety
- ⅓-½ cup water
Instructions
- Make Tart Dough (Yields 2 9-inch Tart Shells): In the bowl of a stand mixer fitted with a paddle attachment, beat the softened butter and sugar over medium-speed for 1 minute.
- Add vanilla, zest, salt, and lightly beaten egg, and mix over low speed until smooth, scraping down the bowl with a spatula as needed. Over low speed, add the flour at once and mix until the dough just begins to come together.
- Transfer the dough to a clean countertop. Using the “fraisage” method, use the heel of your hand to press down and smear the dough onto the counter. Push the dough back together and repeat until smooth and all ingredients are well incorporated. The dough should have a slight sheen to it. Divide the dough equally in half (use a scale for best results), pat each portion into a thin disc and wrap tightly in plastic wrap. Refrigerate for at least one hour. The additional portion of tart dough can be frozen for up to 3 months. Thaw in the refrigerator overnight before using.
- Assemble Tart: Preheat a pizza stone in the oven to 350°F (175°C) for at least 45 minutes.
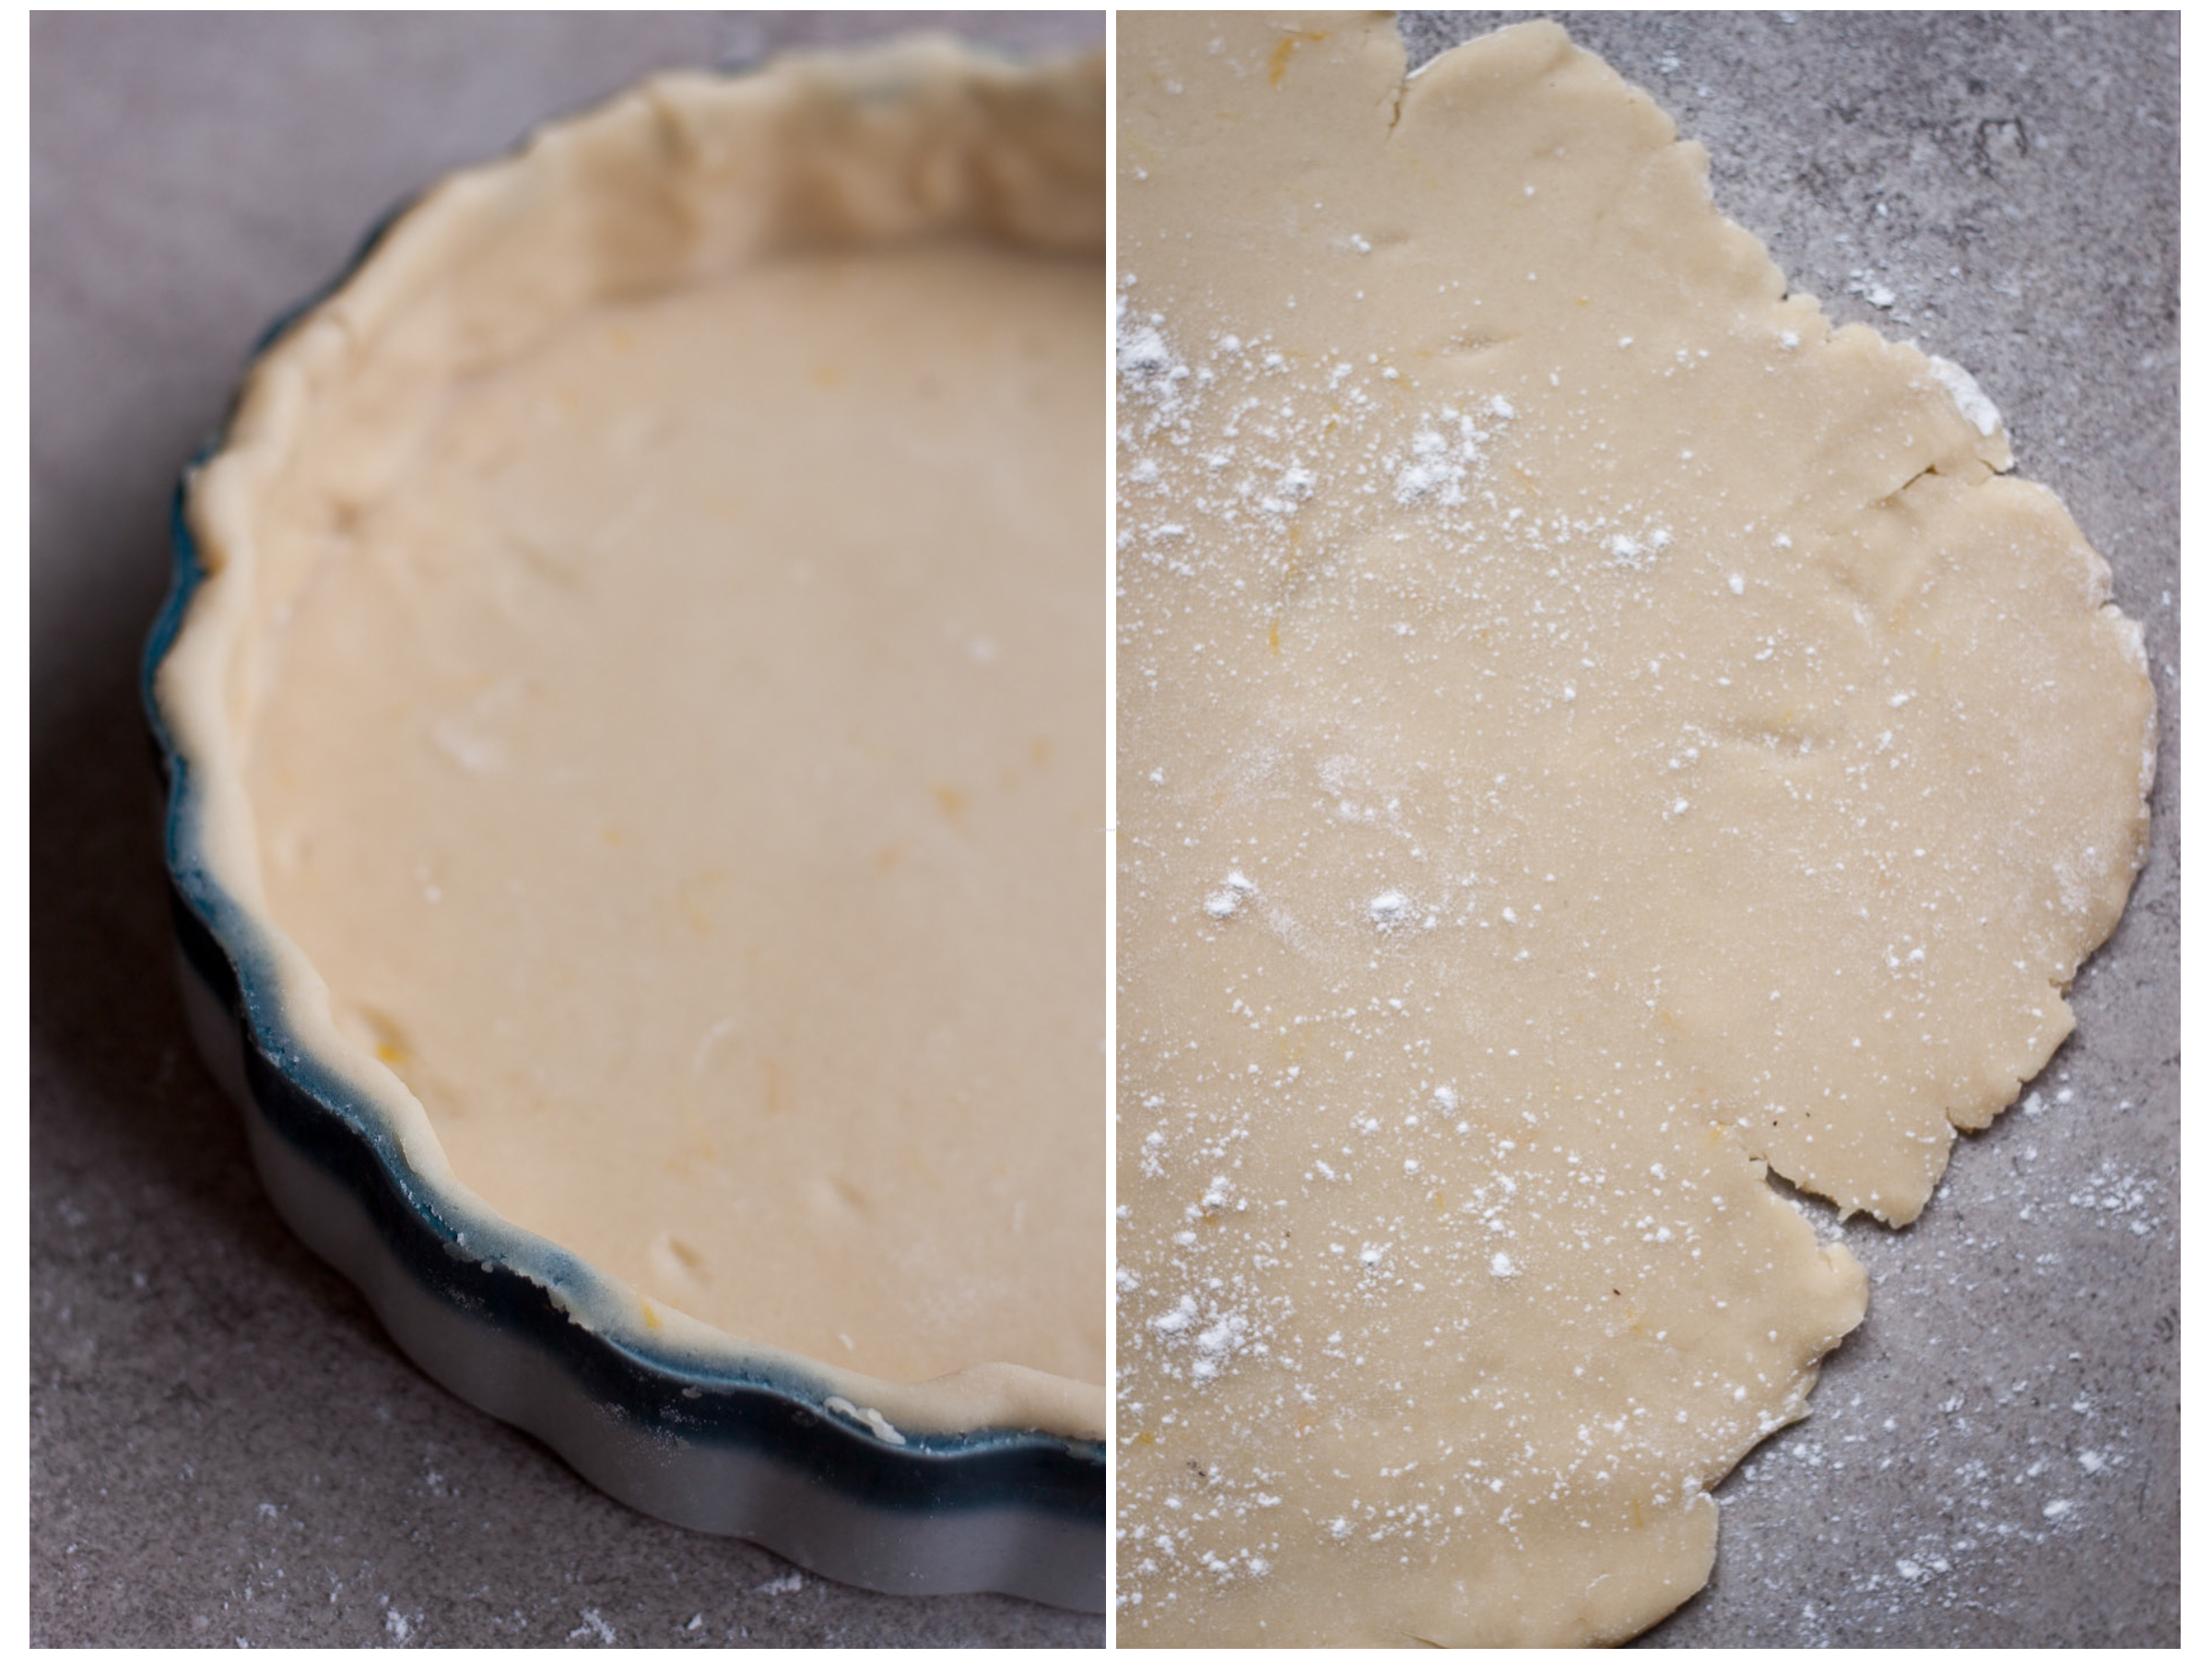
- Remove one tart dough disc from the refrigerator and place on a lightly floured countertop. Allow the dough to rest at room temperature for 5 to 10 minutes. Using a lightly floured rolling pin (starting from the center of dough to the outside), roll the dough into ¼-inch round disc. While rolling the dough, continuously lift and move the dough on the countertop to ensure it is not sticking. Note: If the dough cracks, gently press the pieces back together with hands and continue rolling.
- Using the rolling pin, lift the dough and lay over a 9-inch (1-inch deep) tart pan. Gently guide the dough into the edges of the tart pan (try to avoid stretching the dough). Press the dough tightly inside the sides and edges to shape the tart shell. Trim any dough overhang with a knife. Note: Scraps of dough can be pressed together, frozen, and reused.
- Cover the tart shell tightly with plastic wrap and refrigerate while you prepare the apple filling.
- Prepare Apple Filling: Peel one apple at a time, rubbing the outside of the apple pieces with the lemon halves to reduce browning and oxidation. Slice the apples in half, remove the core, and slice the apple very thinly. Set the apple slices into a large mixing bowl, squeeze and toss with a touch of lemon juice as you work. Repeat with remaining apples. Roughly chop any apple trimmings and set aside separately.
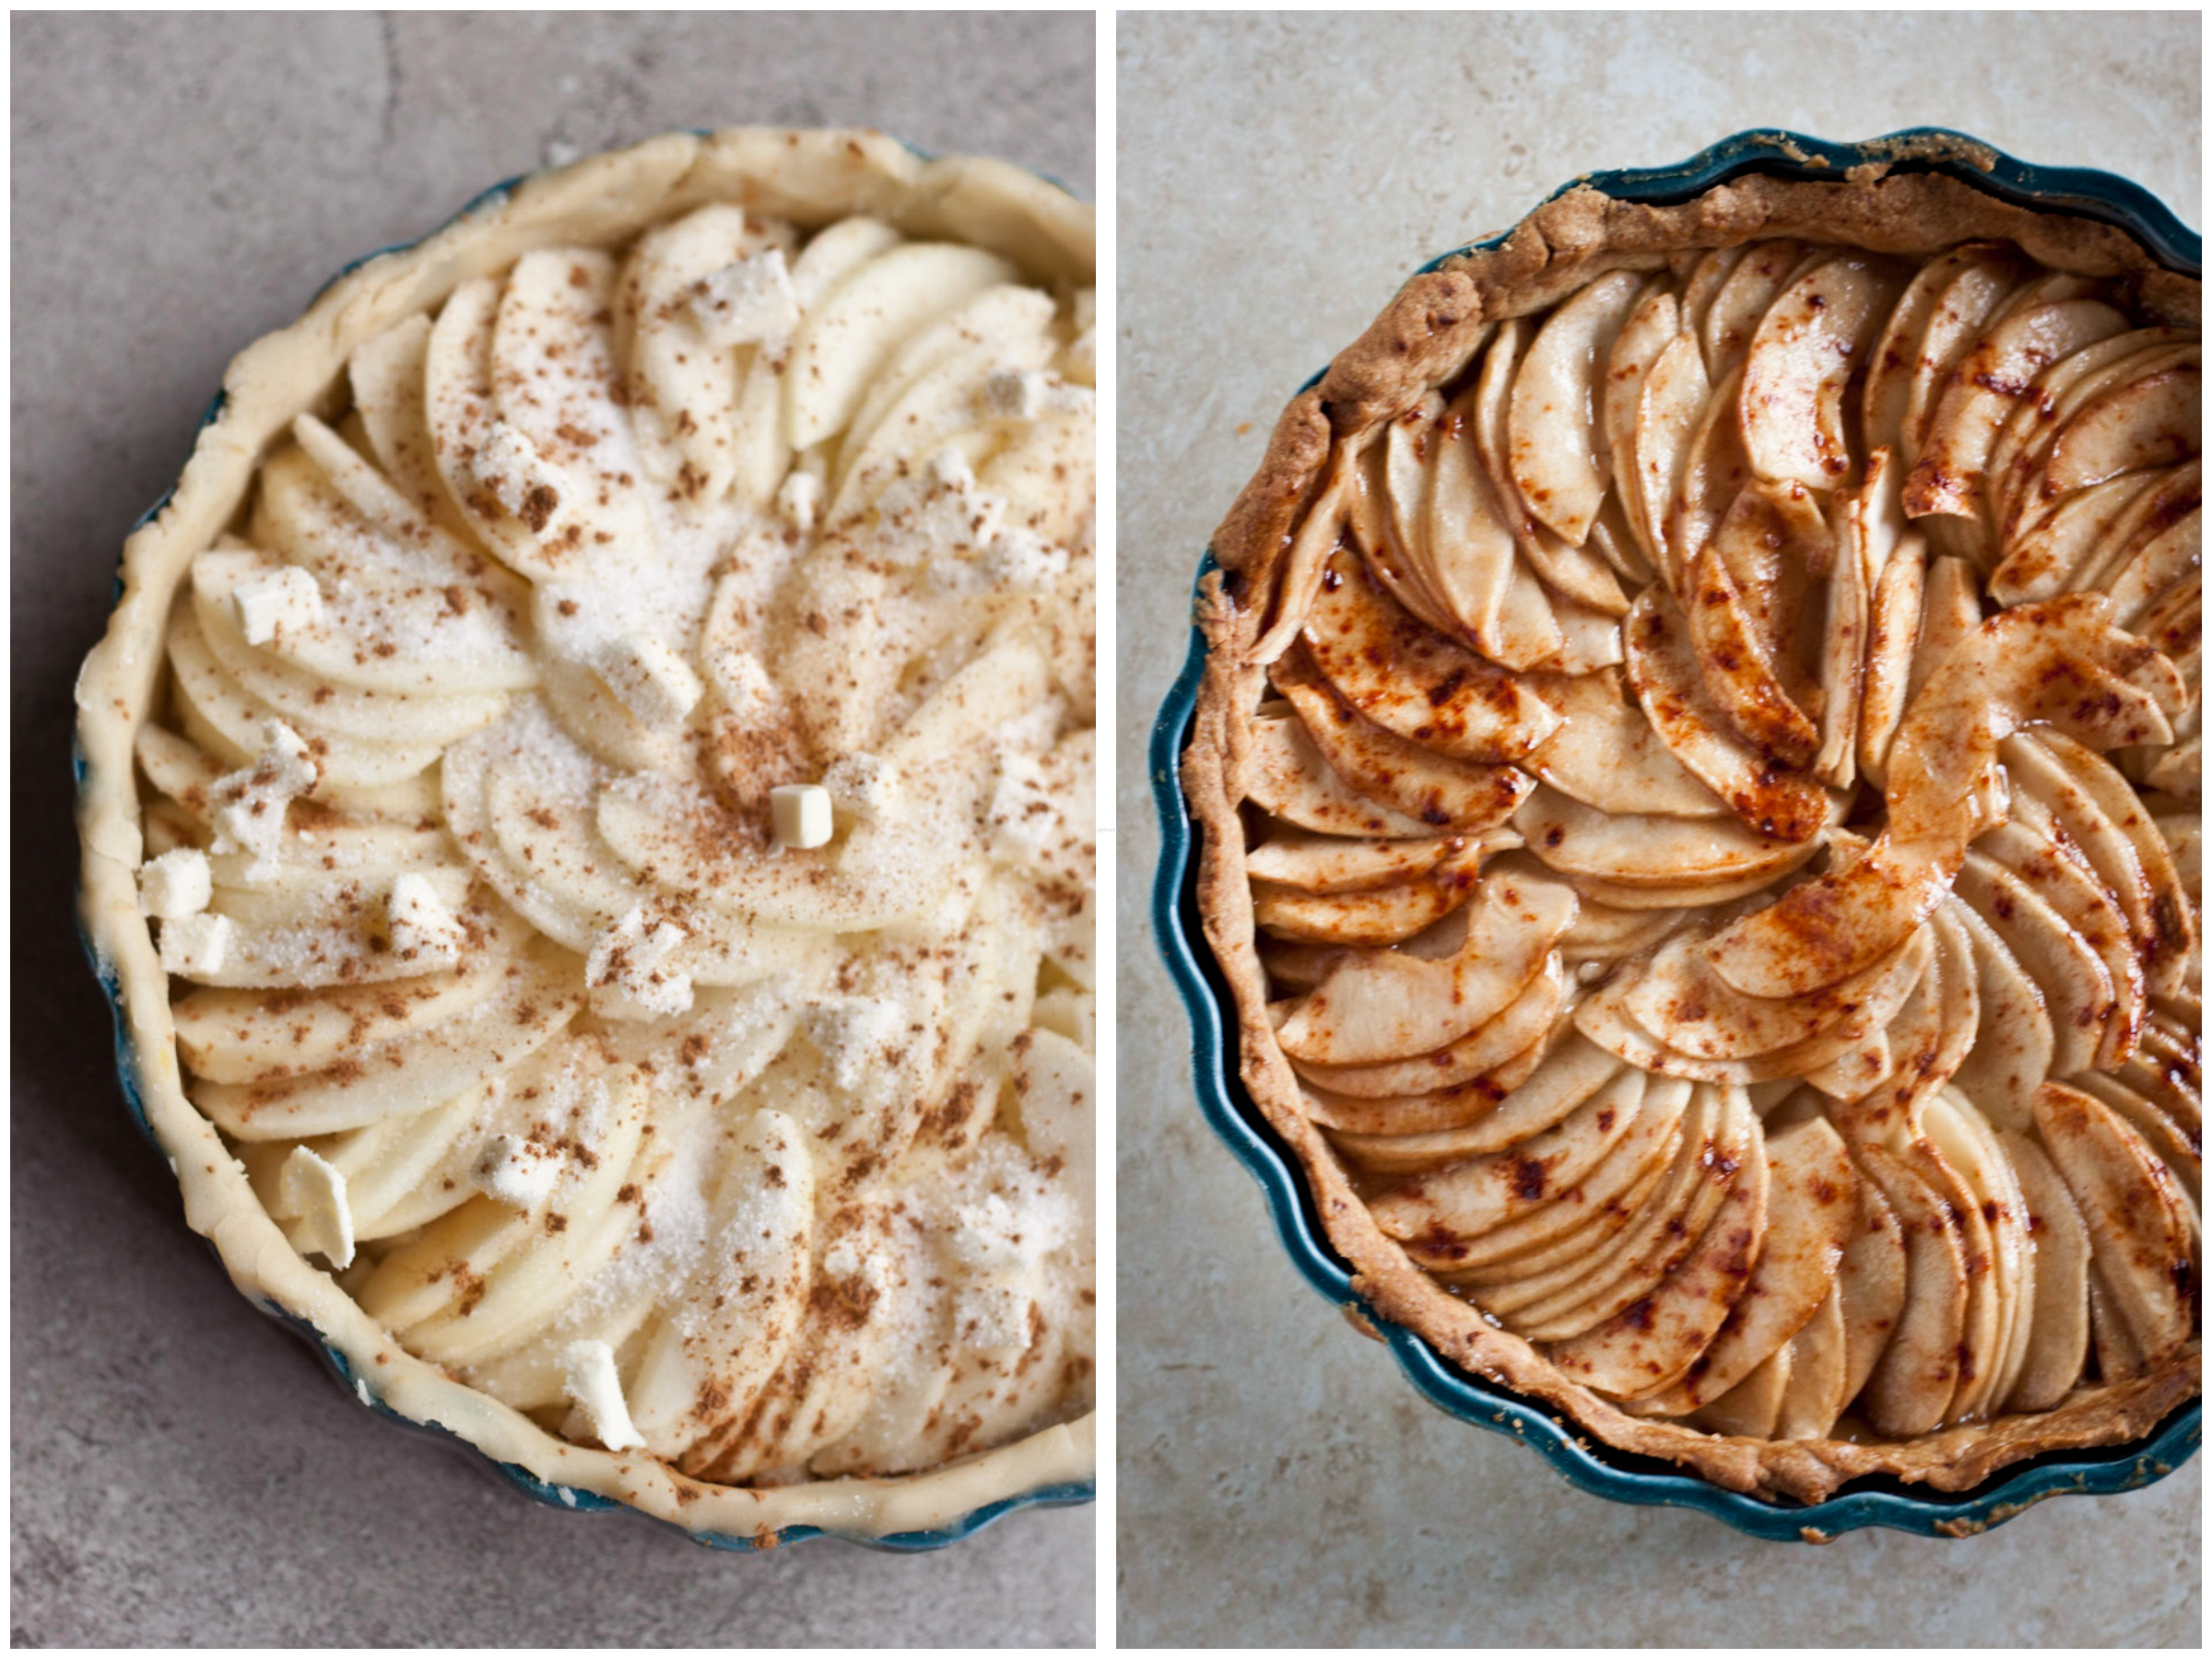
- Remove the tart shell from the fridge, spread any extra apple trimmings onto the bottom of the tart shell. Arrange the apple slices in a circular pattern around the tart shell, starting on the outside of the tart, overlapping the apple slices slightly. This does not need to be perfect.
- Sprinkle the apples evenly with the granulated sugar and top with the small piece of butter. Using a spoon or your fingers, sprinkle on the ground cinnamon.
- Bake the tart directly on the pizza stone for 75 to 90 minutes or until the edges of the tart are golden brown and the apples are tender. Allow to cool on a rack for 15 to 20 minutes before serving.
- Brush with Apple Glaze: Once the tart has cooled slightly, heat the jelly and water (almost equal parts) in a small saucepan over medium heat until bubbling slightly. Whisking frequently until the mixture is smooth, thin, and consistent in texture. Add more water or reduce if necessary to achieve the proper consistency. Using a pastry brush, brush the tart filling with the glaze and let set. Tart is best served slightly warm with vanilla ice cream.

16 Comments on “Rustic French Apple Tart”
Solid recipe thanks!
We French thank you for this delicious recipe! We just loved it!
I might have to shed a tear over not being able to make this or eat any delicious apple recipes for a while. They should totally be a year round thing 😉 Beautiful tart!!
Thank you Rachel! I know, I’m a bit embarrassed to post something with apples this late into the season, but I couldn’t resist. And I actually was able to get very nice, firm ones from Whole Foods the other day 🙂 Can’t wait for all the local peaches to arrive though!
This is SO beautiful, Laura! Next stop: apple tarte tatin!
Thank YOU!! I’ve been dying to make something with apricots actually, but just haven’t found really nice ones at the store yet.
I am in the grey area with you. Some weeks I am obsessed with precision and gravitate toward baking, while other weeks I am more in the mood to throw some things together and see what I can produce. I always appreciate a dish with “rustic” in the name, because they tend to be quite forgiving.
Yes–rustic = forgiving, at least in the case of this dessert. The trickiest part is arranging the apples and not becoming totally obsessive with having them perfectly layered, haha. Thanks for visiting Nora!
Beautiful looking tart! I love tarts and I would have them on a weekly basis if my wife liked them as much as I did.
I totally agree with the two different worlds in the culinary house. Having worked 10 years with the savory side, I can honestly say my heart wanted to work in pastry for about 9 and 3/4 years out of those 10. I hated working with food but loved everything about pastries and baking. If I could have picked (and I couldn’t because everywhere I worked I was cursed to working savory with no hope of changing), I would have gone pastry all the way.
Loved reading your comment and own experience with this having worked in the industry! Very interesting. I realized in my time at the restaurant that I actually preferred baking and pastry as well (in terms of professional production side–but like more a of bakery setting, rather than restaurant “service” one).
Yeah, a dessert/pastry station or area in a restaurant or hotel is totally different than an actual stand alone bakery.
If I were you, this early in my career and knowing which side I preferred, then I would start trying to get my foot into the door of that bakery. Once you work a regular line for about 3 years, like me, you’ll be cursed to work it your entire career unless you know someone that could get you in a bakery. Your resume will only show line and savory experience and no one will hire you to work with pastries. It happened to me, don’t let it happen to you!!
Btw, I could talk hours on my gripes with the industry. I really need to work on that book I wanted to do. :-\
I will be posting an update on what I’m doing relatively soon!!!
Tarts are one of my all-time favorite desserts and perfect for my family parties since my dad isn’t a crazy big dessert person. This is BEAUTIFUL!
My dad is the total opposite–he is a BIG dessert person and loves anything with chocolate. Tarts and crisps are definitely one of my favorite dinner party desserts–they might not be the fanciest dishes, but I always feel the happiest after having a slice. Thanks Sues!
This is such a gorgeous tart! And whaddya know, I just bought 4 pink lady apples at the store yesterday — perfect timing! 🙂
I know it’s a bit late in the season to do stuff with apples, but I’m still finding really nice Pink Lady’s at the grocery store. Thanks Stephanie!